UK Monster Owners Club Forum » .: Technical :. » Mods & How To's » Slow Monster rebuild

Reply
 
Thread Tools Display Modes
Old 17-04-2018, 05:49 PM   #661
Mr Gazza
Lord of the Rings
 
Mr Gazza's Avatar
 
Join Date: May 2013
Location: Norwich
Bike: M900sie
Posts: 5,795
Well I'm glad they didn't let me down after you followed my recommendation... Looks like another smashing job by Aerocoat.
Are you generalizing when you say Gt Yarmouth? I thought they had moved back to St Olaves after a stint in a unit in Beccles.

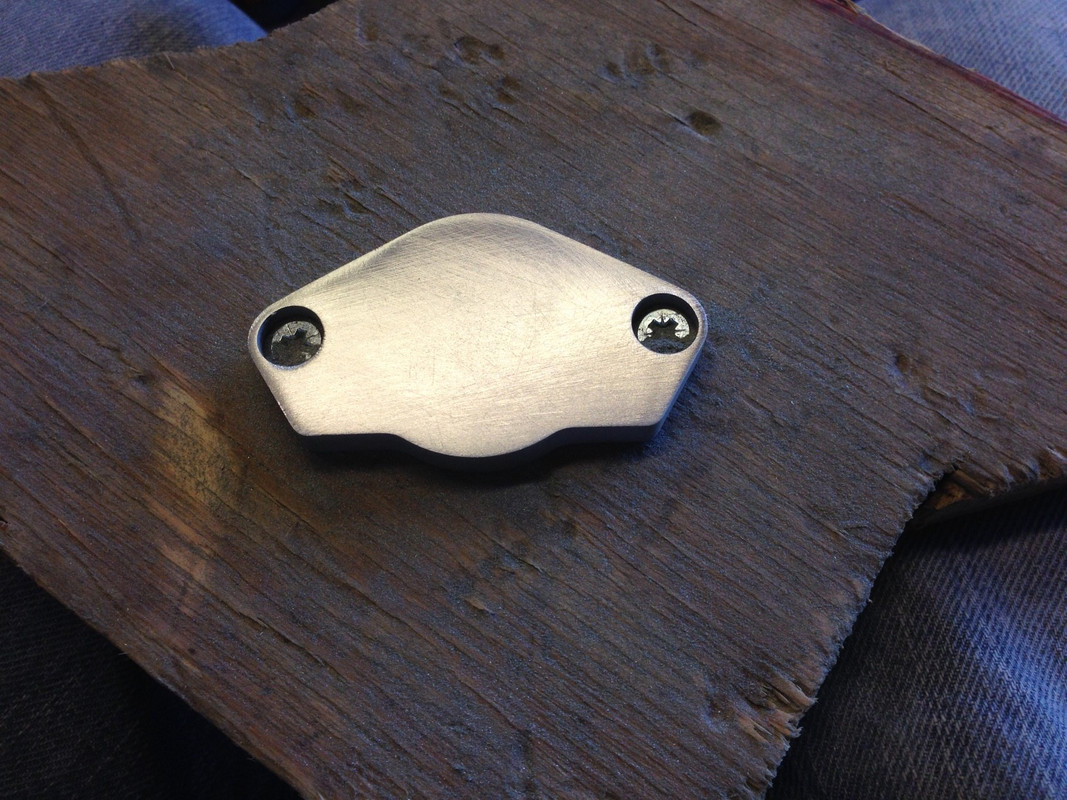
The mirror chrome finish is really good and keeps looking good for a long time. If I had a complaint about it, it would be that it does go on very thick and you need to do some filing and drilling in places to get some things to fit nicely again.
Did you have them mask up your frame/VIN number?

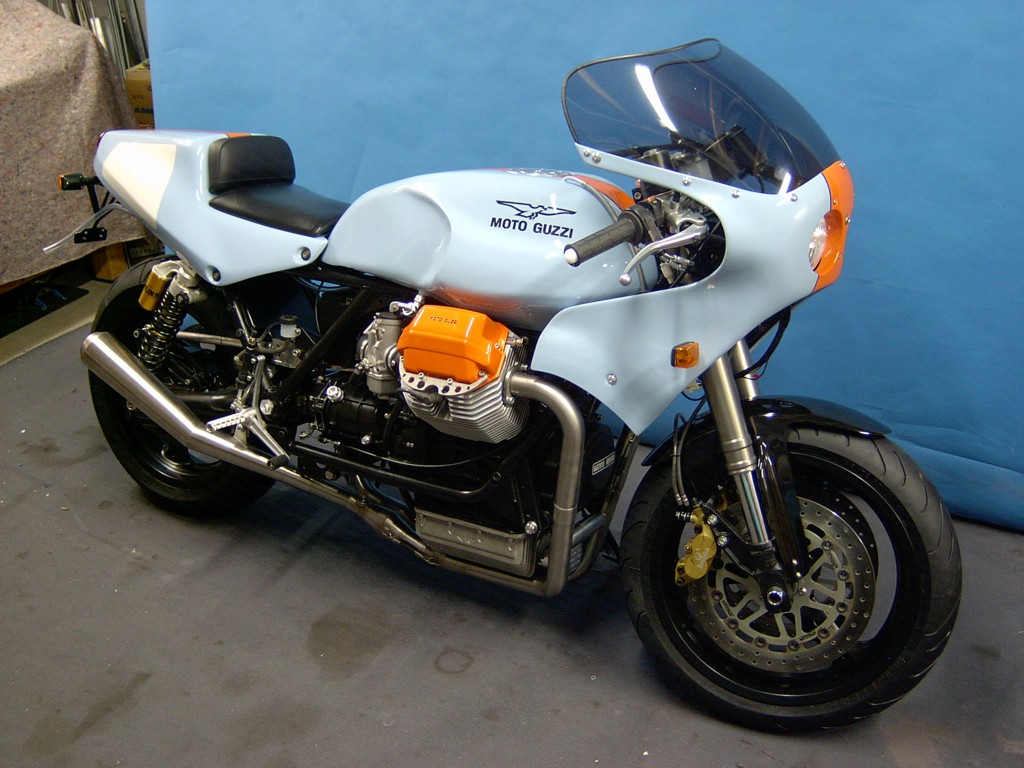
As for colours, of course Red will always work, but not on all of the bodywork.
As you are having so much carbon fibre, I wouldn't be able to resist the temptation to play with some translucent effects and peek-a-boo bits of carbon.
To get a translucent and slightly polychromatic effect, you can mix up to 10% basecoat into your lacquer and build the desired opacity/translucence with multiple thin coats.


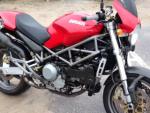
Translucent Gold stripe on my Monster... This needs to be done over clear lacquer. and then lacquered again.


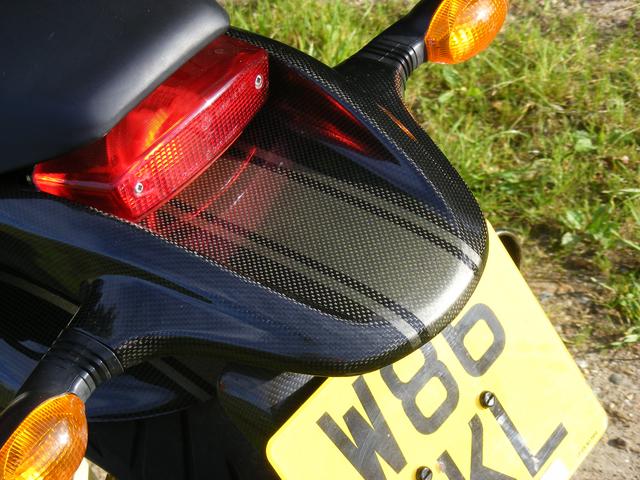
Pinstripes, decals and chequers in peek-a-boo carbon on Capo's tank.
__________________
Mr Gazza is offline   Reply With Quote
Old 17-04-2018, 05:50 PM   #662
alan s4
Registered User
 
alan s4's Avatar
 
Join Date: Sep 2013
Location: Glasgow
Bike: S4 challenge
Posts: 447
Pastel Blue.......got to be a Gulf inspired paint scheme

alan s4 is offline   Reply With Quote
Old 17-04-2018, 07:30 PM   #663
350TSS
Too much time on my hands member
 
350TSS's Avatar
 
Join Date: Jan 2013
Location: Shipbourne
Bike: M900
Posts: 1,419
Gazza - Great Yarmouth is a generic term - its a Norwich postcode but only about 4 miles from Great Yarmouth.
Re the VIn number it was not masked but it is still just visible/legible.
The fading effects are almost certainly beyond me - much as I like them also the peekaboo carbon on the red/white tank.
The Gulf colours are indeed iconic but better suited originally to a Ford GT40 or later to the Porsche 917 - as far as I am aware Ducati's oil company relationships have been with Shell and Agip. I am not really a fan of painting bikes in advertising colours (unless they are coughing up to build it/keep it on the road)
350TSS is offline   Reply With Quote
Old 17-04-2018, 07:33 PM   #664
jerry
Old Git
 
jerry's Avatar
 
Join Date: May 2006
Location: Cricklade
Bike: Multiple Monsters
Posts: 2,804
how about sunburst orange like the original750ss of 1974
__________________
MONSTERMAN
jerry is offline   Reply With Quote
Old 17-04-2018, 08:58 PM   #665
350TSS
Too much time on my hands member
 
350TSS's Avatar
 
Join Date: Jan 2013
Location: Shipbourne
Bike: M900
Posts: 1,419
Cannot place that colour (sunburst orange)
350TSS is offline   Reply With Quote
Old 17-04-2018, 09:00 PM   #666
350TSS
Too much time on my hands member
 
350TSS's Avatar
 
Join Date: Jan 2013
Location: Shipbourne
Bike: M900
Posts: 1,419
http://static.wixstatic.com/media/e7...aabbb726c8.jpg

this may or may not come out
350TSS is offline   Reply With Quote
Old 17-04-2018, 09:03 PM   #667
350TSS
Too much time on my hands member
 
350TSS's Avatar
 
Join Date: Jan 2013
Location: Shipbourne
Bike: M900
Posts: 1,419
its metallic so requires more skill than I have to apply I think,
but does look good if that is the colour you were referring to
350TSS is offline   Reply With Quote
Old 18-04-2018, 04:21 PM   #668
jerry
Old Git
 
jerry's Avatar
 
Join Date: May 2006
Location: Cricklade
Bike: Multiple Monsters
Posts: 2,804
no thats not it ,, its the original factory color a very yellow orange not mettalic on 1974 750ss
look at the link


https://www.google.co.uk/url?sa=i&rc...24154814618856
__________________
MONSTERMAN
jerry is offline   Reply With Quote
Old 19-04-2018, 06:00 PM   #669
350TSS
Too much time on my hands member
 
350TSS's Avatar
 
Join Date: Jan 2013
Location: Shipbourne
Bike: M900
Posts: 1,419
Thought I would get on with the CF moulds today, I mixed up 200ml of primer resin and tried to use the spray gun. I probably managed to spray about 25ml when it started to go glutinous and would not come out of the nozzle. Then I had to spend an hour or so with acetone restoring the gummed up spray gun to something which would work.
About 13.00 Albie popped round and acquired my 1993 seat and cowl and I got an alternator cover inspection plate, which was inscribed Luigi Moto. The plate was screwed to a bit of plywood and out with the 115mm angle grinder with flap wheel and the inscription was no more, 20 minutes with a block and sandpaper and it looks like this

I decided that brush painting the primer resin and a rub down was preferable to spraying. The next 200ml mix was unusable before I had applied 100ml. Next batch was 100ml with ¾ the hardener and about 30ml was unusable. Finally, the last 100ml batch was all applied before it became unworkable, on this batch I was using 50% recommended hardener.
I was warm out there circa 25 degrees in the sun so not that surprising really.
I still have to first coat the tank and hugger but all the rest of the moulds have had 2 coats, they probably need another one.


Unfortunately I left the seat in the sun to cure and the foam inside the mould must have expanded showing the skeleton lines – I could have cried as this will need re-filling and re- sanding and re- priming

350TSS is offline   Reply With Quote
Old 19-04-2018, 07:36 PM   #670
Albie
Fanactical volunteer
 
Albie's Avatar
 
Join Date: Oct 2003
Location: Kent
Bike: M900
Posts: 9,030
It was a tad warm today.. I would have stayed all afternoon had I not got work to do.. Thanks for parts I now have an as new correct looking seat and all is well.
When you need that Senna cleaning I will sort it..
Thanks for the tea and oh yes those wheels are beautiful and that frame is fabulous..
Albie is offline   Reply With Quote
Old 21-04-2018, 06:31 AM   #671
350TSS
Too much time on my hands member
 
350TSS's Avatar
 
Join Date: Jan 2013
Location: Shipbourne
Bike: M900
Posts: 1,419
Good progress made yesterday with the CF moulds, resin primer painting and sanding down. The brush painted moulds took a lot of time to sand down to get the striations out left by the brush and inevitably I rubbed through the primer resin on every mould, which required another coat.
To avoid this, I decided to go back to using a spray gun but mixing the resin with only 50% of the recommended hardener. A few years ago, I impulse purchased a Wagner electric spray gun from the clearance bins in B&Q for £20. I intended to use it for painting fence panels but working in the garden is probably my least favourite activity so I have never used it. My reasoning was that if it fatally gummed up then I would not have lost much.
It worked a treat until the resin in the reservoir pot got below the suction pipe, whereupon resin delivery stopped. Shaking the gun to check whether the resin had gone glutinous cause great gobbets of resin to be deposited on the work piece, in this case, the rear hugger. Bugger!!!! More rubbing down required.
The gap between the suction pipe and the bottom of the paint reservoir allows about 50ml of resin to be sloshing around the reservoir unable to be picked up, which is half of one mix. The primer resin is £16 per litre so the paint brush was pressed into service quickly before it became unworkable.
My compressed air powered spray gun is a gravity feed so this will be used for the final primer coats and the high gloss resin which will be next week’s task.
I still have the petrol tank top and bottom to primer resin as I am undecided on the front mounting arrangement / latch and whether or not I can simplify the design a bit so I can bet away with a 2 split mould rather than a 3 split mould.
My job list to completion was updated and the estimated time to finish the bike is now 350 hours. Trouble is I keep inventing new jobs, the latest additions are:
1. Sand blast the alternator cover and clutch cover (just painted them anthracite) and send them together with the rocker covers and cam covers to Aerocoat to get them finished the same as the swinging arm and frame. Estimate 2 hours.
2. Make some CF cam belt covers. Estimate 6 hours.
3. Make the inner most component of the cam belt covers in 6mm aluminium to replace the really heavy steel and bonded rubber (and broken) existing ones. Estimate 4 hours.
Also, I have discovered that my rear brake hanger with its nice twin ball race centre will not work as the inner race would be subject to clamping by the wheel spindle and there is not enough surface area on the bearing where it touches the swinging arm. I will have to machine two top hat spacers as per the Ducati design (they knew what they were doing these boys) estimate 4 hours.
350TSS is offline   Reply With Quote
Old 21-04-2018, 09:27 AM   #672
Mr Gazza
Lord of the Rings
 
Mr Gazza's Avatar
 
Join Date: May 2013
Location: Norwich
Bike: M900sie
Posts: 5,795
Before you drive to Yarmouth and back and couple more times..
Your frame and swinging arm look fantastic. If you look closely you will probably notice that the frame has a convincing Chrome finish and the swinging arm probably has more of a look of polished alloy?
This is due to how the two different materials hold their heat during the curing process.
When I had my bits done in Mirror Chrome, I included my brake and gearchange levers. I was disappointed with the first attempt at this and returned them for a another go. Unfortunately this was equally disappointing and I ended up burning the coating off and polishing the levers, this was harder than normal as I revealed a grit blasted surface under the coating!

What I am saying is that small alloy parts might be disappointing as they cool down too quickly and have insufficient area for the coating layers to flow properly.
Another issue that I would worry about personally, would be the gasket faces.. How to deal with those? Mask up or re-finish after?
I reckon I could mirror polish all those bits in the time it would take you to drive to Yarmouth and back twice.. Plus saving a drive through Yarmouth, which is not that Great..!
__________________
Mr Gazza is offline   Reply With Quote
Old 21-04-2018, 12:15 PM   #673
Albie
Fanactical volunteer
 
Albie's Avatar
 
Join Date: Oct 2003
Location: Kent
Bike: M900
Posts: 9,030
Having seen the frame in the flesh as to speak I can assure folk its stunning more like a chrome pewter colour but in the sunshine it reflected my bright turquoise Seat Leon wonderfully. The swingarm also looks good.
I am of the opinion that it may well be a harder job to do the clutch and alternator casings because of all the bolt holes and bearing and mating faces. TBH I would do the clutch cover but personally not that original Elephant alloy one. I would hope someone has a steel one laying around to bring some powdercoat too. If I had one I would personally donate one. I know its all about weight too but I think an open clutch or carbon one would be better with weight loss. Not sure if I remember Scrapps had one laying around from his old bike.
Of course posting too would be obvious and no doubt being done as a frame really has to be delivered.
Albie is offline   Reply With Quote
Old 27-04-2018, 04:08 PM   #674
350TSS
Too much time on my hands member
 
350TSS's Avatar
 
Join Date: Jan 2013
Location: Shipbourne
Bike: M900
Posts: 1,419
My estimate for the removal of the paint from the alternator and clutch covers was way too low (actually took 8 hours). The top coat proved remarkably and annoyingly resilient to sand blasting and the etch primer was even worse. I would 100% recommend anyone contemplating refinishing their engine cases to use etch primer first. Further advice to engine re-finishers – take the masking tape off after 24 hours, I left mine for 5 days and the adhesive had set like concrete, it took a Stanley knife to get it off.
I decided to take Mr Gazza’s advice and not visit Great Yarmouth again and post/send the cases and the rocker and cam covers off to Aerocoat. I attached them to aluminium plates so that the gasket faces were not compromised during the coating process (another invented job that took another 4 hours). The last vestiges of the road-sign were used as a base and the gasket face and the areas where they touched the aluminium base were “insulated” by a layer of masking tape. The heads of the retaining screws were treated to a 3 coatings of release agent. No idea whether this will work or survive the baking process but it seemed like a good idea.
I have included the oil cooler mesh guard and the exhaust hanger bracket in the package to go to Aerocoat. This last item has had the welds “tidied up” with body filler and bathroom sealer silicon injected to provide the resilient mount, I hope these both survive the baking.
Albie’s alternator inspection cover got further treatment with a flap wheel in the angle grinder as it stood far too proud. Sadly, the seal at the back did not survive the heat generated but would have been renewed anyway.
Otherwise, it has just been more filling and rubbing down of CF moulds, dull work and not photogenic at all.
350TSS is offline   Reply With Quote
Old 27-04-2018, 05:08 PM   #675
Mr Gazza
Lord of the Rings
 
Mr Gazza's Avatar
 
Join Date: May 2013
Location: Norwich
Bike: M900sie
Posts: 5,795
Mate, I still think you will suffer some grief with those covers if you try and get them powdercoated. They look so well prepared, why don't you paint them?

I think you will get a radius of coating at the edge of the cover, onto your alloy masking. This will make it difficult to separate the mask and then leave a sharp edge of coating sticking out. If you are going for Mirror Chrome again, then I can tell you that the Chrome effect is only at the surface of the coating , so filing down the sharp edge will reveal a Black substrate.
One way to avoid that would be to make your alloy masks actually follow the shape of the covers so the edges of the covers and mask are flush. Then when you separate the mask, the edge of the coating will face the cases.

I also think that the crankshaft cover on your alternator cover will be permanently attached if you coat it bolted on like that. At the very least it will be messy getting it off!

Coating is going to go down past all your socket heads into the counterbores and fix the screws in... Again, messy getting them out. The release agent will do nothing.

On a positive note, there is a sealant that Sika does, which will withstand coating temperatures and is also coatable. I might possibly run into my powder coater mate tomorrow, so I will ask him which sealant it is, otherwise I can't ask him till Monday... If you are interested?
__________________
Mr Gazza is offline   Reply With Quote
Reply


Posting Rules
You may not post new threads
You may not post replies
You may not post attachments
You may not edit your posts

BB code is On
Smilies are On
[IMG] code is On
HTML code is Off

Forum Jump


All times are GMT. The time now is 10:46 AM.

vBulletin Skins by vBmode.com. Powered by vBulletin® Version 3.8.3
Copyright ©2000 - 2024, Jelsoft Enterprises Ltd.