UK Monster Owners Club Forum » .: Technical :. » Mods & How To's » Slow Monster rebuild

Reply
 
Thread Tools Display Modes
Old 29-06-2018, 03:17 AM   #691
350TSS
Too much time on my hands member
 
350TSS's Avatar
 
Join Date: Jan 2013
Location: Shipbourne
Bike: M900
Posts: 1,419
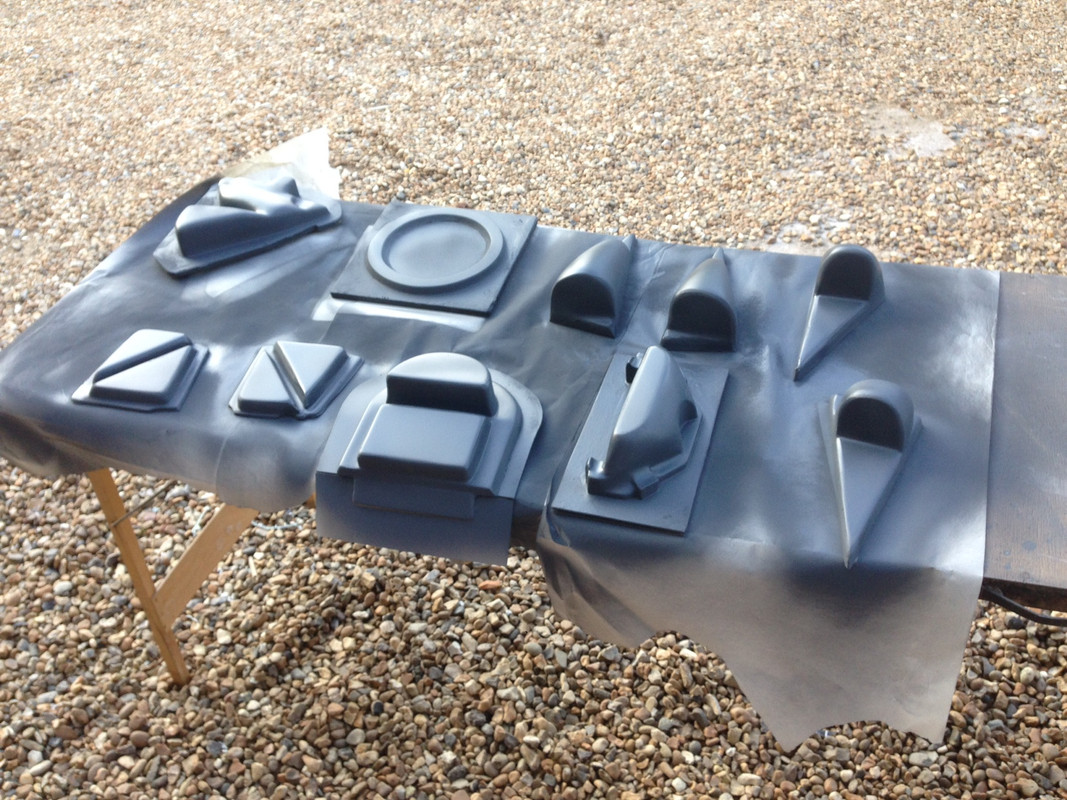
On Tuesday, 5 individual coats of release agent were applied to each of those patterns that do not require split moulds and then first gel coat was applied. It felt very alien to put large gobbits of gel coat onto the patterns that I had spent ages trying to get smooth and polished. This cured overnight and they looked OK, so a second gel coat was applied yesterday.
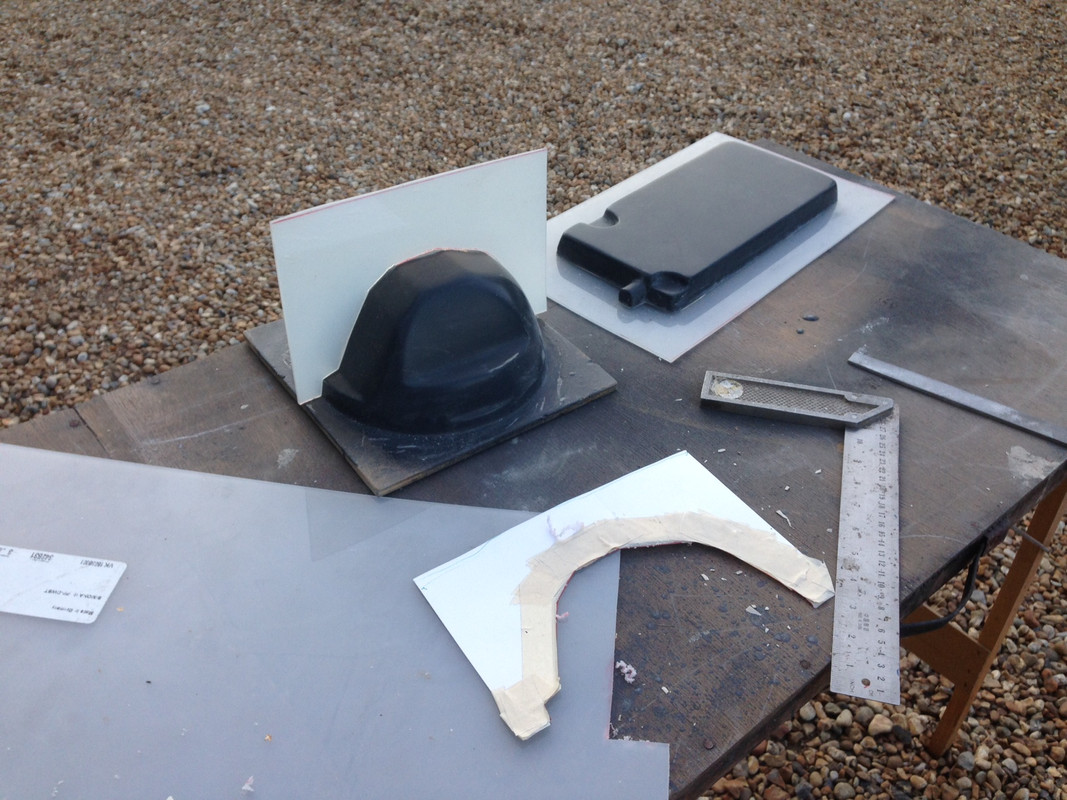
Here is my worry, the ignitech enclosure came out fine


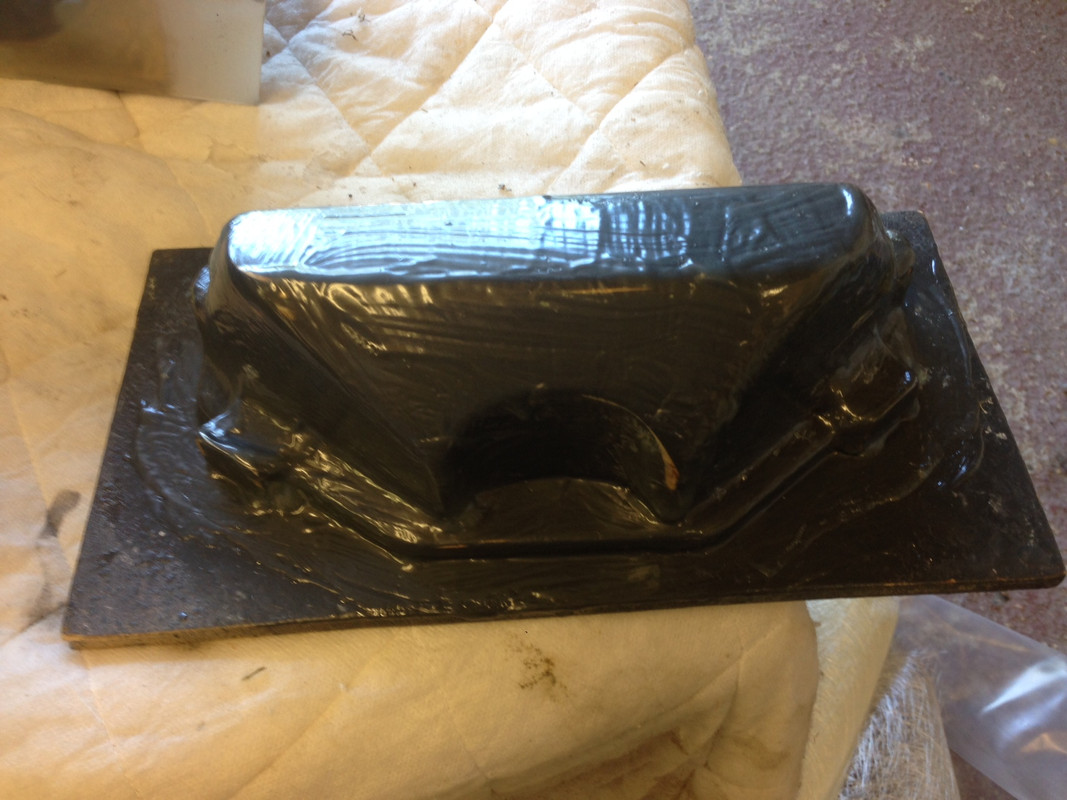
but to a greater or lesser extent all the other patterns came out with blisters. See the tool tray below.


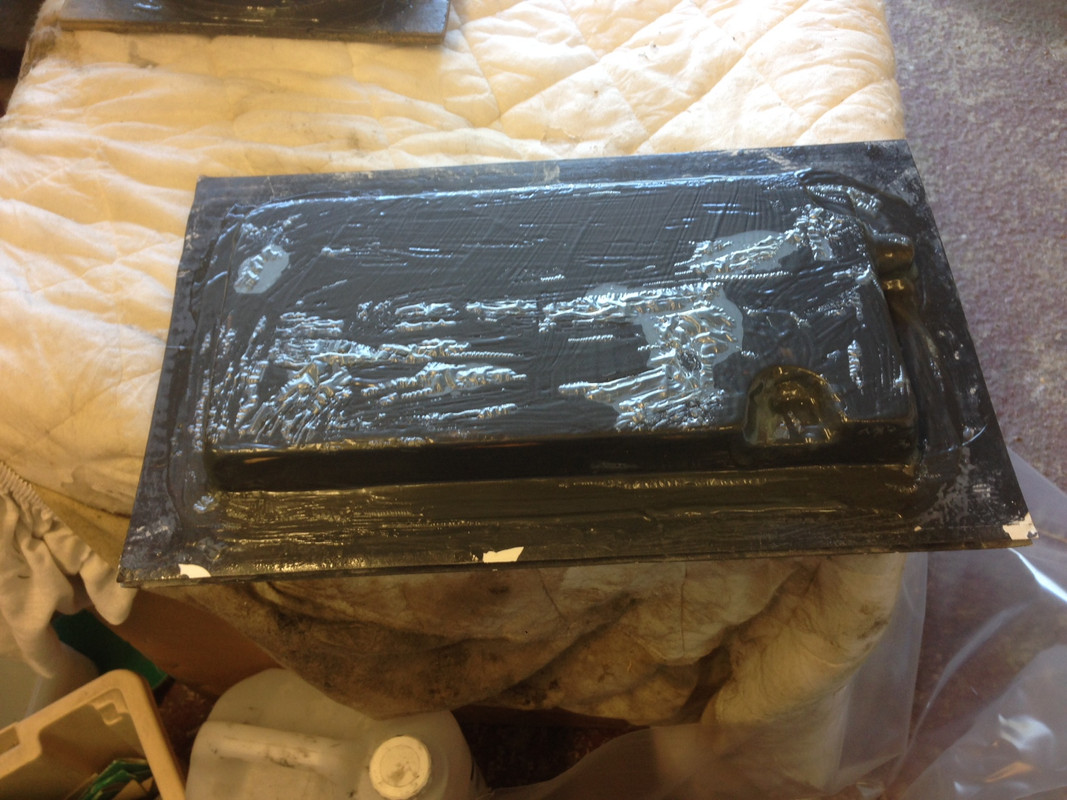
If these blisters are pressed one can see air moving beneath the surface. The trouble is I do not know whether this air is trapped a) between the two gel coats or b) between the pattern and the two coats. If a) applies then I might still be able to make a reasonable mould. If b) applies the affected moulds are scrap although the patterns should be salvageable.
Also, I have no idea why this happened, the mix gel coat to catalyst was the same, the temperature at the time of mixing and curing was approximately the same and nothing was touched or done to introduce contaminants that could have caused this reaction.
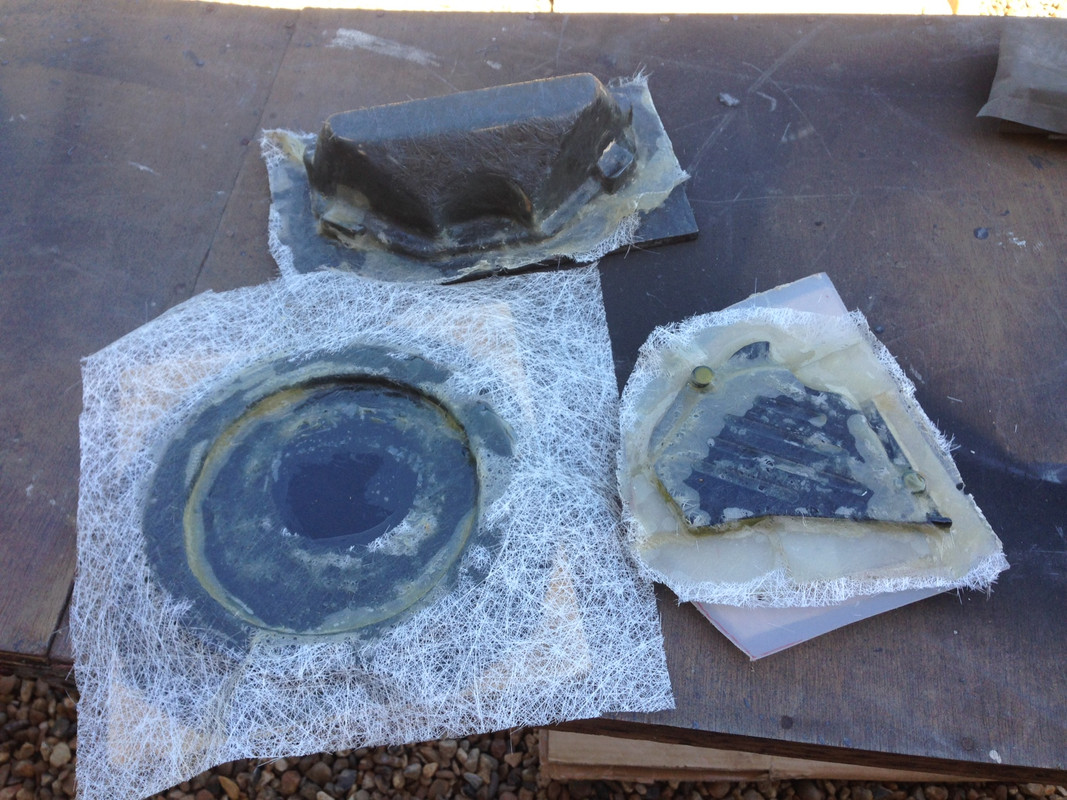
I have 2 options now 1) try to remove all the gel coat and start from scratch or 2) carry on and see how they come out and if necessary remake them. I will try option 2 with a few of the smaller patterns so that I do not waste too much resin, fibre glass and time.
Yesterday, I re-visited my excel planning schedule and despite adding a few jobs (making CF belt covers and aluminium backing plates I only (????) have 326 hours to completion.
350TSS is offline   Reply With Quote
Old 29-06-2018, 07:50 AM   #692
Nasher
Registered User
 
Nasher's Avatar
 
Join Date: Jul 2014
Location: Portsmouth
Bike: M900
Posts: 1,510
That looks like silicone or oil contamination to me, preventing the gel from curing completely.
If you have Fibreglassing materials around you haven't by chance spilt or contaminated it with Wax in Styrene? or perhaps some overspray from a silicone based polish etc.

If silicone it's possible that it will migrate through the gel and stop any further layers going off in those areas.

I've had this in the past, particularly when flowcoating or sheathing marine ply which is either contaminated or has patches of naturally soaked in sap.

Nasher
__________________
Heaven doesn't want me, and Hell is afraid I'll take over.
Nasher is offline   Reply With Quote
Old 30-06-2018, 01:12 PM   #693
350TSS
Too much time on my hands member
 
350TSS's Avatar
 
Join Date: Jan 2013
Location: Shipbourne
Bike: M900
Posts: 1,419
Bad day yesterday – turning the patterns into moulds
The task was to lay a coupling coat on top of the gel coat on the patterns, the coupling coat comprises special resin that adheres well to the gel coat and has a layer of fine 100g glass chopped strand mat stippled into it. The fine mat apparently has less of a tendency to show through to the gel coat and acts as a bonder for the later 4 layers of 350g heavier glass chopped strand mat that provides ultimately the rigidity for the mould.
I decided to progress further with those patterns that had not evidenced too much blistering on the second gel coat just to see whether I could get away with it.
With the kitchen scissors, I cut the 100g mat into shapes that would wrap around each individual pattern allowing at least 25 mm surplus around the edge. The coupling resin was measured 100ml and mixed with the catalyst 3ml and the chosen patterns were wetted and the 100g mat laid on the top. I started with the sprocket cover and could not get the 100g mat to follow the contours, it kept moving and you could see the air gap as a white instead of resin coloured finish, I moved on to the ignitech enclosure and had a bit more success but still the white patches remained. All this took too long and as I moved onto the inner ring for the headlamp the remaining mixed-up resin (about 60ml) in the marmalade jar went solid. I quickly detached all cut shapes of 100g mat from the other patterns.


The white patches mean that the gel coat will be separated and unsupported by the coupling coat. I will have to finish these 3 moulds, separate them from the patterns and re-make them. In future the 100g mat will be cut to shapes that fit the intricacies of the pattern, rather than trying to be forced to follow the contours under the pressure of the stippling brush
350TSS is offline   Reply With Quote
Old 30-06-2018, 01:16 PM   #694
350TSS
Too much time on my hands member
 
350TSS's Avatar
 
Join Date: Jan 2013
Location: Shipbourne
Bike: M900
Posts: 1,419
Thanks Nasher I will double check what is lying around and limit the chances of any contamination when,as I inevitably will, re-make them
350TSS is offline   Reply With Quote
Old 03-07-2018, 05:52 PM   #695
350TSS
Too much time on my hands member
 
350TSS's Avatar
 
Join Date: Jan 2013
Location: Shipbourne
Bike: M900
Posts: 1,419
Another massively net negative day for this project.
At least I think I have worked out why the gel coat blistered. After I had rubbed down with the 2000 grit pads I thought I would give the patterns an extra polish and I used car polish (turtle wax) before I put the release agent on – some residue of it obviously migrated through the release agent and caused the blistering. Odd though that it did not show up on the first coat.
Closer examination of the blistering showed that it started at the junction between the first coat and the pattern not between the coats. That meant there was no point in continuing with them so most of this morning was spent removing the gel coat from all the patterns, like peeling a lot of hard-boiled eggs only more difficult and a lot harder on my right thumb nail.
My inability to remove the gel coat (admittedly in unsupported form) in substantial pieces also told me:
a) that most of my patterns will need to be modified (bugger!) to eliminate all sharp corners/right angles. The gel coat simply would not release either side of a right angle, presumable because it shrinks a bit during curing. This means at least an extra 30 hours filing radiuses, then priming and top-coating and multiple rub downs in between; and
b) that if I want to ensure that the moulds release from the pattern they will all have to be split moulds meaning that I will have to decide where to split the mould, cut polypropylene sheet to the contour of the cross section where the split is to be made and then make the half mould twice. This is also I estimate a further 30 hours work (double bugger!!)
c) my battery carrier mould may not be manufacturable at all using this method.
I started this project to learn how to do stuff, sometimes I just wish the lessons were not so hard learned.
350TSS is offline   Reply With Quote
Old 03-07-2018, 08:26 PM   #696
utopia
No turn left unstoned
 
utopia's Avatar
 
Join Date: Jun 2010
Location: leicester
Bike: M750
Posts: 4,545
On the chopped straw matting, in my admittedly limited experience it is better to tear it roughly to shape than to cut it.
The raggedy edges can be draped over the corners and used to unite the sections of mat.
This also avoids cut lines which are weak points unless subsequently overwrapped with further matting.

If you're using epoxy resin, Easy Composites do fast and slow hardeners.

I used plastic shot glasses from the pound shop as mixing vessels.
Also coffee stall wooden stirrers as mixing tools.
Better to mix twice in smaller batches than to rush to use resin that's starting to go off.

And the twill weave cloth drapes much, much better, though that's probably more for the actual parts than for the moulds.

I made myself a roller out of bent rod, a turned roller barrel and a file handle.
Roller held on with tight fitting plastic tube on the end of the rod.
utopia is offline   Reply With Quote
Old 03-07-2018, 10:24 PM   #697
350TSS
Too much time on my hands member
 
350TSS's Avatar
 
Join Date: Jan 2013
Location: Shipbourne
Bike: M900
Posts: 1,419
Utopia - you are absolutely right about shredding rather than cutting the chopped mat, I had forgotten it, my last go at fibre glassing was repairing fairings after I fell off when racing (it was a regular occurrence then at least 6 times a year for 6 years) and that was a very loooong time ago.
350TSS is offline   Reply With Quote
Old 08-07-2018, 07:17 AM   #698
Raven
Guest
 
Posts: n/a
So that evening we spent at Strand Glass in Brentford in 1971 learning the intricacies of fibreglass repair was completely wasted then. T
  Reply With Quote
Old 17-07-2018, 09:44 PM   #699
350TSS
Too much time on my hands member
 
350TSS's Avatar
 
Join Date: Jan 2013
Location: Shipbourne
Bike: M900
Posts: 1,419
Been a while since last posting, mainly because not much Monster progress in the intervening period, SWMBO elevated loads of house maintenance type jobs because her college friend was visiting from Australia – re-laying patio tiles frost damaged in 2017, making the garden fountain work etc., etc.
Today was spent modifying the patterns to get rid of sharp corners and where possible putting them on a polypropylene base rather than a wooden or estate agent board base. I started with the air scoop patterns and took them off their bases, I tried them in their respective locations and they would not fit? WTF? Obviously my previous efforts to have non parallel sides to the patterns (so I could get away with non split moulds) involved a thin triangular fillet of filler towards the base. Also, the frame has now been powder coated and this has decreased the available space by nearly a millimetre. Bloody glad I did just try then out as I would have looked a proper clown if I had carried on without doing so. After all the work that had gone into them to get them polished it nearly broke my heart to take the angle grinder to them with an abrasive flap wheel, still needs must. The instrument nacelle had the same treatment.

I spent about 2 hours rubbing them down and was about to primer resin coat them when I felt a few drops of rain. I moved on to making the mould dividers for the headlamp shell and the tool tray. The technique when you have established where the mould is to be split is to cut a cardboard template as close to a fit with the cross section of the split in the mould. Then using small strips of masking tape you adjust the profile until it is a reasonably good fit, less than 1mm gap. Then transfer the resulting profile onto 3mm polypropylene sheet and cut it out with a jigsaw. The hard part is then filing the polypropylene (which does not file readily) to a good fit. Any gaps remaining between the polypropylene barrier and the pattern can be filled with wax and trimmed with a wooden lolly stick.
350TSS is offline   Reply With Quote
Old 18-07-2018, 08:23 PM   #700
350TSS
Too much time on my hands member
 
350TSS's Avatar
 
Join Date: Jan 2013
Location: Shipbourne
Bike: M900
Posts: 1,419
Long day cutting and filing polypropylene - although happy to be making progress again.
Tomorrow I will primer (and possibly gloss) resin those patterns that have had their right angles radiused.


I have yet to make mould dividers for the seat, hugger, fly-screen and tank.
I am not looking forward to the tank, tempting fate, I do not think the others will be too problematic. The tank I know will be an absolute sod and I suspect the battery box will stay in the mould when I try to release it.
350TSS is offline   Reply With Quote
Old 18-07-2018, 09:06 PM   #701
Jez900ie
Pleasantly surprised!
 
Jez900ie's Avatar
 
Join Date: Nov 2016
Location: Stoke on Trent
Bike: M900ie
Posts: 780
Good to see an update, and see the progress. Well done that man!
__________________
Monsters don't hide under the bed, they sleep inside the shed
Jez900ie is offline   Reply With Quote
Old 19-07-2018, 08:57 PM   #702
350TSS
Too much time on my hands member
 
350TSS's Avatar
 
Join Date: Jan 2013
Location: Shipbourne
Bike: M900
Posts: 1,419
Nowhere near as much progress as I wanted today. I put primer resin on the sanded patterns, I opted to apply it directly over the exposed but smoothly sanded wood – mistake. I use about 10% thinners in the resin so that it sprays more easily and I think the thinners reacted with the wood and raised all the grain, I tried a second coat but no good, nothing for it but to rub down tomorrow and apply a smear of body filler, rub that down and a further primer coat.

A bit disheartened by this I thought I would get on with a nice sit-down job, painting the clutch master cylinder. Some while ago I bought some specialist brake calliper paint (gloss black) off fleabay, heat and brake fluid resistant (about £9 for 125ml).
I couldn’t swear to it but it smells and has the same consistency as Hammerite and what is more is that Hammerite thinners cleans the brush. If it waddles, quacks and looks like a duck it probably is. After it was painted it looked awful - too shiny and the brush marks very much in evidence, a job for tomorrow when it is fully dry is to cut it back with 800 wet and dry, mask up the sight window and rubber boot covering the actuator rod and put it with the callipers so I can spray them all together this time with Hammerite satin black.
350TSS is offline   Reply With Quote
Old 16-08-2018, 07:37 AM   #703
350TSS
Too much time on my hands member
 
350TSS's Avatar
 
Join Date: Jan 2013
Location: Shipbourne
Bike: M900
Posts: 1,419
Not much progress over the past few weeks - other stuff intervening
1. good weather meant an opportunity to spray the bonnet on my daughter's Jazz
This had to be done outside as the garage is too full of bikes and stuff. I used rattle cans (a lot) and clear lacquer which made quite a good difference to the finish
350TSS is offline   Reply With Quote
Old 16-08-2018, 07:56 AM   #704
350TSS
Too much time on my hands member
 
350TSS's Avatar
 
Join Date: Jan 2013
Location: Shipbourne
Bike: M900
Posts: 1,419
Finish is a bit stripey but good enough
The second interruption came from my wife requiring that I find a project for my two sons to keep them away from the PS4 over the long summer holidays.
350TSS is offline   Reply With Quote
Old 16-08-2018, 08:04 AM   #705
350TSS
Too much time on my hands member
 
350TSS's Avatar
 
Join Date: Jan 2013
Location: Shipbourne
Bike: M900
Posts: 1,419
About 30 years ago I bought a TS 125 MZ from a bloke in a pub for £10, no registration document or even any number plate. I was pissed at the time so that was my excuse.
When I got he bike home, half of it in boxes, the engine ran but very roughly. When i tried to set the points the gap kept wandering and I realised that ther main bearings had gone allowing the crank to move up and down and hence no consistent points gap. This was probably a job too far. Any sensible bloke would have scrapped it and written off the £10 to experience. I have however transferred the bike and boxes through 3 house moves.
My eldest son has not shown much interest in my bike projects to date but with the prospect of being able to ride this one he has engaged enthusiastically.
Here is the state of play as of yersterday
350TSS is offline   Reply With Quote
Reply


Posting Rules
You may not post new threads
You may not post replies
You may not post attachments
You may not edit your posts

BB code is On
Smilies are On
[IMG] code is On
HTML code is Off

Forum Jump


All times are GMT. The time now is 06:29 AM.

vBulletin Skins by vBmode.com. Powered by vBulletin® Version 3.8.3
Copyright ©2000 - 2024, Jelsoft Enterprises Ltd.