UK Monster Owners Club Forum » .: Technical :. » Mods & How To's » Slow Monster rebuild

Reply
 
Thread Tools Display Modes
Old 24-03-2017, 05:41 PM   #106
slob
.
 
slob's Avatar
 
Join Date: Jul 2003
Location: East London
Bike: Multiple Monsters
Posts: 9,707
I got a pair of black plastic bar ends from a 620dark and stuffed them in the back of the frame
slob is offline   Reply With Quote
Old 27-03-2017, 05:37 AM   #107
350TSS
Too much time on my hands member
 
350TSS's Avatar
 
Join Date: Jan 2013
Location: Shipbourne
Bike: M900
Posts: 1,419
I trimmed the brake hanger bracket today. I tried a jigsaw to trim it but with a (short) metal cutting blade it would not negotiate the bends without disengaging and banging on the bracket, so it was out with the rasp. I took 16mm off widthways and it only took about 30 minutes. I would have liked to take more off but that would mean I would have to re-manufacture the steel bracket that is to be brazed to the frame, also the rigidity of the bracket has reduced significantly and any more off would have weakened it too much I think.
Aesthetically it is much better now and when the bulk of the tank and the seat are added above I think it will look OK and if it is still too prominent it can always be painted to match the tank/seat
I originally intended to use male/female vibration mounts (as fitted to the oil cooler mounts), 2 x 15mm at top and 25mm at bottom to secure it to the frame/exhaust but I have decided to use the grommet and top hat washers (as used for the rear tea tray/number plate mounts) at the top which will keep the bracket tucked closer to the centre line of the frame. The bracket is consequently still not fail safe but I will be using the same mount as for the oil cooler so I only need to carry one spare if I choose to take the bike to see my mate in the south of France.

screen shot
350TSS is offline   Reply With Quote
Old 27-03-2017, 05:41 AM   #108
350TSS
Too much time on my hands member
 
350TSS's Avatar
 
Join Date: Jan 2013
Location: Shipbourne
Bike: M900
Posts: 1,419
Sorry - re- posted the original picture by mistake here is the modified (narrowed) one.

images hosting
350TSS is offline   Reply With Quote
Old 27-03-2017, 05:44 AM   #109
350TSS
Too much time on my hands member
 
350TSS's Avatar
 
Join Date: Jan 2013
Location: Shipbourne
Bike: M900
Posts: 1,419
Slob: I wanted to use the frame end plugs for seat/number plate/ rear light mounts so they need to be threaded and I am not sure plastic ones would have fit the bill.
350TSS is offline   Reply With Quote
Old 27-03-2017, 01:00 PM   #110
utopia
No turn left unstoned
 
utopia's Avatar
 
Join Date: Jun 2010
Location: leicester
Bike: M750
Posts: 4,545
You know what ... I think that your lightening holes are more trouble than they're worth.
Particularly the larger one at the top.
They are weakening the bracket laterally so much that it would be just about as strong if you removed the centre section entirely and squashed the sides together .. in other words a narrower bracket with no holes.
This would also look much more minimal, despite not being drilled.
You don't really need the width on the bracket anyway because this only contributes to fore and aft strength, and there is very little load in that direction.
You only need the width at the mounting point, so the bolts have enough spread to make a solid mount.
Alternatively, to make the existing bracket look more minimal you could probably cut out the entire centre section without making the bracket any weaker, as the bits between the holes aren't doing anything much at all.
Is that really 4mm ally ? .. it looks thinner.
I'd probably go for something thicker, and use a narrower piece of it .. same weight but stronger laterally.
Also the thicker the ally, the less steep the bends need to be. Not by a lot granted, but every little helps.
utopia is offline   Reply With Quote
Old 28-03-2017, 08:40 PM   #111
350TSS
Too much time on my hands member
 
350TSS's Avatar
 
Join Date: Jan 2013
Location: Shipbourne
Bike: M900
Posts: 1,419
Really enjoyable day in the garage today. Not much further forward overall but much more content with the outcome.
I decided the 4mm aluminium exhaust hanger bracket was too flimsy and with a vibration mount at one end was not a "fail safe" bracket so I knocked this up from some 20mm OD x 1mm tube and some 10mm OD x 1mm tube.

image post

upload pictures online
350TSS is offline   Reply With Quote
Old 28-03-2017, 08:51 PM   #112
350TSS
Too much time on my hands member
 
350TSS's Avatar
 
Join Date: Jan 2013
Location: Shipbourne
Bike: M900
Posts: 1,419
I originally intended to use 8mm bore rubber air hose to provide a vibration isolation but when I tightened up the through bolts it was virtually solid. I turned down 2 spacers from 10mm aluminium bar, 4mm longer than the mounting eye tubes and then bored them 6mm. The void between the ID of the mounting eye tubes and the spacers will be filled with clear silicone bathroom sealer to provide the right degree of elasticity.

image hosting free

host image
350TSS is offline   Reply With Quote
Old 28-03-2017, 09:09 PM   #113
Albie
Fanactical volunteer
 
Albie's Avatar
 
Join Date: Oct 2003
Location: Kent
Bike: M900
Posts: 9,030
That's better imho. I never wanted to comment but I did wonder why it was so vertical when you could have used less material much more down the frame. Less is sometimes more
Albie is offline   Reply With Quote
Old 28-03-2017, 10:16 PM   #114
Dirty
Bockloks
 
Dirty's Avatar
 
Join Date: Jan 2012
Location: London
Bike: No Bike Yet!
Posts: 4,601
New bracket looks much better
__________________
Wounds heal, chicks dig scars, glory lasts forever


Dirty is offline   Reply With Quote
Old 29-03-2017, 08:09 AM   #115
350TSS
Too much time on my hands member
 
350TSS's Avatar
 
Join Date: Jan 2013
Location: Shipbourne
Bike: M900
Posts: 1,419
Glad you agree. The rationale for the near vertical aluminium bracket was to align with the rear suspension hoop, but that is now history.
The last picture with the brake master cylinder shows a clash between the bolt head holding the exhaust hanger and the brake pipe union. In reality it will be slightly worse when I fit the brake light pressure switch (necessary because there is no mounting place for a standard mechanical contact switch) which has an even larger footprint than the union. In order to maintain lateral alignment of the brake actuator rod and the centre of the brake master cylinder, I can only spacer the master cylinder about 6mm from the face of the rear set which is not quite enough to give the necessary clearance. This will require a bit of pondering, which is, I think, always the best bit about building a modified bike - how best to make the modification safely, in a way that you have the capability to manufacture the modification, and that is elegant (minimalist), durable, functional and aesthetically pleasing and is maintainable.
A hydraulic switch is probably more reliable but its positioning is not ideal and there will be a lead to it outside the main frame rail so not aesthetically pleasing.
Ducati mechanical rear brake switches are notoriously unreliable, I must have replaced at least one on each of my 4 Ducatis and they always seem to misbehave the on the day before MOT. Also the arrangement of the rear set has no obvious location to mount a bracket to hold the unreliable Ducati switch.
If I stare at it long enough I am sure a solution will become evident.
350TSS is offline   Reply With Quote
Old 29-03-2017, 08:52 AM   #116
Darren69
Transmaniacon MOC
 
Darren69's Avatar
 
Join Date: Sep 2013
Location: Sutton In Ashfield
Bike: Multiple Monsters
Posts: 6,022
Countersink the rearset mounting holes and use countersunk socket bolts? They would look neater and give you more room.
__________________
Roast Beef Monster!

Termignoni and Bucci - Italian for pipe and slippers!

S4 Fogarty, S4R 07T, 748, Series 1 Mirage
Darren69 is offline   Reply With Quote
Old 29-03-2017, 09:13 AM   #117
Dukedesmo
Registered User
 
Dukedesmo's Avatar
 
Join Date: Sep 2010
Location: Leics
Bike: M900
Posts: 2,838
Quote:
Originally Posted by 350TSS View Post
The last picture with the brake master cylinder shows a clash between the bolt head holding the exhaust hanger and the brake pipe union. In reality it will be slightly worse when I fit the brake light pressure switch (necessary because there is no mounting place for a standard mechanical contact switch) which has an even larger footprint than the union.
A banjo bolt pressure switch is no wider than a banjo bolt, a bit longer but should fit in there no problem - I have one on mine for the same reason.

New exhaust bracket is much better and I'm liking the thread.
__________________
M900, 916, LeMans II.

Dukedesmo is online now   Reply With Quote
Old 29-03-2017, 09:32 AM   #118
utopia
No turn left unstoned
 
utopia's Avatar
 
Join Date: Jun 2010
Location: leicester
Bike: M750
Posts: 4,545
How about either ....
Countersinking the hole in the rearsets and using a matching bolt (or perhaps counterboring).
Or, using longer bolts to mount the master cylinder and fixing a different bracket (back to ally plate) off their protruding ends.
Personally I think I'd favour the latter as it gives a more positive mounting at the frame end.
In a purely structural sense, the best method might be another bracket welded on the frame, but lower down. But it wouldn't look quite as clean.
Finally, and following on from Albie's comment, I hope you don't find my suggestions intrusive .. just trying to be helpful.
utopia is offline   Reply With Quote
Old 29-03-2017, 10:41 AM   #119
Dukedesmo
Registered User
 
Dukedesmo's Avatar
 
Join Date: Sep 2010
Location: Leics
Bike: M900
Posts: 2,838
As for countersink, spacers etc. this is how mine fits;


Different rearsets but maybe of interest?
__________________
M900, 916, LeMans II.

Dukedesmo is online now   Reply With Quote
Old 29-03-2017, 04:40 PM   #120
350TSS
Too much time on my hands member
 
350TSS's Avatar
 
Join Date: Jan 2013
Location: Shipbourne
Bike: M900
Posts: 1,419
Thanks all, no one is intrusive all good ideas gratefully received (I am not sure what to do with bad ones????)
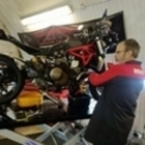
Today was trying to solve the clash elegantly. I thought the problem was the bolt head protruding beyond the face of the rear set. so how to get rid of the bolt head. A mushroom cap screw was considered but difficult to buy in that length also the hole in the rear set was drilled an odd size (slightly less than 7mm).
My solution was to tap the hole in the rear set 8mm and machine a piece of steel bar with an 8mm thread for the thickness of the rear set and turn it down to 6mm for 45mm and thread the last 10mm with a 6mm die.
It took a long time to make because the only bit of steel I had was 10mm diameter and my lathe will only cut steel about 006" per cut. Also all the calibrations on the lathe traverser and lengthways slide are imperial.
Anyway when I fitted it the brake pipe union still fouled the rear set so I will have to turn up some spacers similar to those in Dukedesmo's post.

free picture upload
350TSS is offline   Reply With Quote
Reply


Posting Rules
You may not post new threads
You may not post replies
You may not post attachments
You may not edit your posts

BB code is On
Smilies are On
[IMG] code is On
HTML code is Off

Forum Jump


All times are GMT. The time now is 08:23 AM.

vBulletin Skins by vBmode.com. Powered by vBulletin® Version 3.8.3
Copyright ©2000 - 2024, Jelsoft Enterprises Ltd.