UK Monster Owners Club Forum » Gallery » UKMOC Bikes » My M900 Project...

Reply
 
Thread Tools Rate Thread Display Modes
Old 05-08-2015, 02:00 PM   #61
ibanezlynx
Guest
 
Posts: n/a
You've got it. Been a guitar player for many years. Time is just the issue as I get older... Used to gig a lot and was lead guitarist in a pink floyd tribute band.

I used the VHT paint. If you type in VHT paint in ebay it comes up. If you want colour specifics I can get you them. http://www.vhtpaint.com/
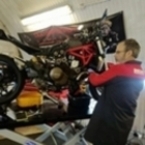
I baked the heads, covers and barrels in the oven at work but as you say little bits have chipped off where I've knocked them with a spanner or something. As careful as I have been it's inevitable.
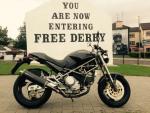
This bike will be so looked after bit will be ridden also (in the dry). Hard to keep things perfect with UK roads... I have a Yamaha XT660X which I do my miles on and to play about.
  Reply With Quote
Old 15-08-2015, 06:56 PM   #62
ibanezlynx
Guest
 
Posts: n/a
Had some good progress today. Engine in frame with front and back ends on. Not long now...


[IMG][/IMG]
  Reply With Quote
Old 18-08-2015, 10:29 AM   #63
Nottsbiker
Guest
 
Posts: n/a
Looks like you are making some great progress there mate

Is the silver frame made to look like aluminium or is it the camera?
  Reply With Quote
Old 18-08-2015, 05:45 PM   #64
ibanezlynx
Guest
 
Posts: n/a
Thanks mate. The frame was shot blasted, dipped and powder coated. It's like a metallic silver but quite subtle. I found it very difficult to match a colour similar enough to the stock colour.
  Reply With Quote
Old 18-08-2015, 09:23 PM   #65
Albie
Fanactical volunteer
 
Albie's Avatar
 
Join Date: Oct 2003
Location: Kent
Bike: M900
Posts: 9,030
Mine gets done next Wednesday in bronze powder. Going to be worrying of how close to original but looks close. Yours is looking great in silver. Mine was silver but had a hint of something.
Albie is offline   Reply With Quote
Old 19-08-2015, 01:21 PM   #66
Nottsbiker
Guest
 
Posts: n/a
Makes me think of getting mine done ally style by Aerocoat for a Spondon / Martek look farme
  Reply With Quote
Old 29-08-2015, 04:12 PM   #67
ibanezlynx
Guest
 
Posts: n/a
Spent some time today getting on. Carbs and fuel lines assembled. Brakes and clutch bleed and feeling good. Pretty much all done apart from the airbox and I need to solder up the heavy gauge battery wires. Hopefully try and start in on Tuesday...
[IMG][/IMG]
  Reply With Quote
Old 29-08-2015, 04:45 PM   #68
Yorkie
Anglo-Saxon Warrior
 
Yorkie's Avatar
 
Join Date: Aug 2002
Location: North Yorkshire
Bike: M900
Posts: 2,485
Cool

Lovely looking project.

Yorkie
__________________
NO ICE, GUN IT!
Yorkie is offline   Reply With Quote
Old 29-08-2015, 05:12 PM   #69
Darren69
Transmaniacon MOC
 
Darren69's Avatar
 
Join Date: Sep 2013
Location: Sutton In Ashfield
Bike: Multiple Monsters
Posts: 6,022
Looks sweet. Nice job!
__________________
Roast Beef Monster!

Termignoni and Bucci - Italian for pipe and slippers!

S4 Fogarty, S4R 07T, 748, Series 1 Mirage
Darren69 is offline   Reply With Quote
Old 29-08-2015, 06:07 PM   #70
Pedro
Ciao, come stai?
 
Pedro's Avatar
 
Join Date: Apr 2003
Location: Somewhere
Bike: Multiple Monsters
Posts: 4,157
Nice looking bike you have there, can't beat the original!
__________________
M900 - 1993!
Monster 1200R!
Pedro is offline   Reply With Quote
Old 29-08-2015, 06:22 PM   #71
squarehead
Guest
 
Posts: n/a
Great work.
  Reply With Quote
Old 29-08-2015, 08:44 PM   #72
Davy
Registered User
 
Davy's Avatar
 
Join Date: Aug 2007
Location: Derry
Bike: M900
Posts: 358
Nothing in the world to match these original 900 works of art.
__________________
1994 M900 Black
Davy is offline   Reply With Quote
Old 01-09-2015, 07:26 PM   #73
Albie
Fanactical volunteer
 
Albie's Avatar
 
Join Date: Oct 2003
Location: Kent
Bike: M900
Posts: 9,030
I finally discovered what I needed regards the rectifier mounting looking at one of your pictures. Thanks for that and its what I thought as in mine has obviously had a replacement one as yours has angular top and bottom and mine is rectangular and the hole centres are out hence mine has a bracket and triangulated fitting method. This is why threads need photos to help others out. You have my thanks.
Need to see the correct fitment of fusebox type screws to frame now.
Albie is offline   Reply With Quote
Old 03-09-2015, 10:01 AM   #74
ibanezlynx
Guest
 
Posts: n/a
No worries mate. Thanks for all the nice comments. Will post some detailed pics soon.
If you need any pics or info just let me know Albie...
  Reply With Quote
Old 03-09-2015, 10:17 AM   #75
Darren69
Transmaniacon MOC
 
Darren69's Avatar
 
Join Date: Sep 2013
Location: Sutton In Ashfield
Bike: Multiple Monsters
Posts: 6,022
Quote:
Originally Posted by Albie View Post
I finally discovered what I needed regards the rectifier mounting looking at one of your pictures. Thanks for that and its what I thought as in mine has obviously had a replacement one as yours has angular top and bottom and mine is rectangular and the hole centres are out hence mine has a bracket and triangulated fitting method. This is why threads need photos to help others out. You have my thanks.
Need to see the correct fitment of fusebox type screws to frame now.
Some of the older posts seem to have lost the pictures. Have they been moved or deleted?
__________________
Roast Beef Monster!

Termignoni and Bucci - Italian for pipe and slippers!

S4 Fogarty, S4R 07T, 748, Series 1 Mirage
Darren69 is offline   Reply With Quote
Reply


Posting Rules
You may not post new threads
You may not post replies
You may not post attachments
You may not edit your posts

BB code is On
Smilies are On
[IMG] code is On
HTML code is Off

Forum Jump


All times are GMT. The time now is 10:15 PM.

vBulletin Skins by vBmode.com. Powered by vBulletin® Version 3.8.3
Copyright ©2000 - 2024, Jelsoft Enterprises Ltd.