UK Monster Owners Club Forum » .: Technical :. » Mods & How To's » Another build thread - Ducati 1000

Reply
 
Thread Tools Display Modes
Old 26-07-2020, 07:50 PM   #16
Kato
Dismantled
 
Kato's Avatar
 
Join Date: Feb 2006
Location: East Molesey
Bike: Multiple Monsters
Posts: 2,222
Interesting 41mm FCR's on those long intakes will bring peak torque in quite low in the rev range should get of the line quite quickly...... Looks great, nice work
__________________
"Political correctness is just intellectual colonialism and psychological fascism for the creation of thought crime"

Kato is offline   Reply With Quote
Old 26-07-2020, 08:33 PM   #17
pooh
Lincolnshire Area Rep
 
pooh's Avatar
 
Join Date: Oct 2002
Location: Grimsby
Bike: M900ie
Posts: 469
Nice looking workshop I’m jealous!

Ian
__________________
Slighty less brain cells than I was born with
pooh is offline   Reply With Quote
Old 31-07-2020, 09:08 AM   #18
buzzer
Registered User
 
buzzer's Avatar
 
Join Date: Jun 2018
Location: Wolverhampton
Bike: M900
Posts: 392
One of the things I have always struggled to get done is plating... I have had some terrible jobs done in the past, and lost critical small parts to the bottom of someone's plating vat!

so about 4 years ago I bought a plating kit to do zinc... Have to say it's VERY good and I have used it time and time again! its a bit time consuming, but time is something I have, particularly at the moment...

Here are the results for my latest build. the kit can do clear and yellow passivation, you can see the difference.


buzzer is offline   Reply With Quote
Old 31-07-2020, 09:41 AM   #19
Mr Gazza
Lord of the Rings
 
Mr Gazza's Avatar
 
Join Date: May 2013
Location: Norwich
Bike: M900sie
Posts: 5,795
+1 for home plating.
I've got a set up for bright nickel plating.
I have dedicated mops and soaps for steel, so I polish bits up to a mirror finish and then Nickel plate them. The finish is barely distinguishable from Chrome and pleases me immensely.
__________________
Mr Gazza is offline   Reply With Quote
Old 31-07-2020, 10:33 AM   #20
buzzer
Registered User
 
buzzer's Avatar
 
Join Date: Jun 2018
Location: Wolverhampton
Bike: M900
Posts: 392
Quote:
Originally Posted by Mr Gazza View Post
+1 for home plating.
I've got a set up for bright nickel plating.
I have dedicated mops and soaps for steel, so I polish bits up to a mirror finish and then Nickel plate them. The finish is barely distinguishable from Chrome and pleases me immensely.
I may give the Nickel plating kit a try, thanks!
buzzer is offline   Reply With Quote
Old 31-07-2020, 05:10 PM   #21
walkingpictures
preneolithic frebie
 
walkingpictures's Avatar
 
Join Date: Sep 2002
Location: Cambridge
Bike: S4Rs
Posts: 319
Quote:
Originally Posted by Mr Gazza View Post
+1 for home plating.
I've got a set up for bright nickel plating.
I have dedicated mops and soaps for steel, so I polish bits up to a mirror finish and then Nickel plate them. The finish is barely distinguishable from Chrome and pleases me immensely.
Hi Gaz,have you ever polished stainless headers?I had some on my 916 many years ago and being polished just set them off nicely.

Kimbo
walkingpictures is offline   Reply With Quote
Old 31-07-2020, 05:35 PM   #22
crust
rattles when he walks
 
crust's Avatar
 
Join Date: Aug 2002
Location: in the comfy chair,moved furniture around
Bike: M900
Posts: 1,065
Been mulling this over as a result of my rustoration project. There's a lot of fasteners and brackets looking very manky, I'm not really a get someone to do it person, especially if there's an opportunity to buy tools and do it myself.

Kind of narrowed it down to a couple of kits:

https://classic-plating.co.uk/produc...l-plating-kit/

or

https://www.gaterosplating.co.uk/ind...&path=59_60_91

The second one has been recommended but the first appears to have more of the necessary parts.

Hmmm, back to mulling and awaiting other peoples thoughts.
crust is offline   Reply With Quote
Old 31-07-2020, 06:11 PM   #23
Mr Gazza
Lord of the Rings
 
Mr Gazza's Avatar
 
Join Date: May 2013
Location: Norwich
Bike: M900sie
Posts: 5,795
Quote:
Originally Posted by walkingpictures View Post
Hi Gaz,have you ever polished stainless headers?
Kimbo
Do Bears live on the Norfolk Broads? Of course! I have polished the headers on all my Ducatis. I also like to take the anodising off the silencers and polish the sleeves.

Best to use the right soaps for the different metals and have dedicated mops for each soap.
I get my metal polishing supplies from https://www.metalpolishingsupplies.co.uk/

I got the 5L kit from Gateros https://www.gaterosplating.co.uk/ind...product_id=207

In addition I bought plastic tubs for the etching and rinsing chemicals. I think I got 3L tubs and then 5L ones. The chemical goes in the small tub and then that sits in the bigger one which is filled with hot water so the inner tub is warmed.
I also bought shed loads of de-ionised water.
I thought the current regulator that was supplied with the kit was a recipe for disaster, so I also bought one of their "power box" thingies so I have a better handle on the current.
Come to think of it I also got some polyester filter bags for the Nickel ingots, so bear in mind that the kit is a basic starter.. I still recommend it though.
You get through quite a bit of copper wire striped from domestic cable too.

Incidentally I also bought a small bar of pink soap for Chrome. This does actually work very well at bringing up old chrome, so long as it hasn't started to flake. The bonus is that will also really set off the fresh bright nickel plating with a light buff and make it even more like Chrome.

As Buzzer said, it's all rather time consuming, but very absorbing and rewarding.
__________________
Mr Gazza is offline   Reply With Quote
Old 31-07-2020, 06:27 PM   #24
walkingpictures
preneolithic frebie
 
walkingpictures's Avatar
 
Join Date: Sep 2002
Location: Cambridge
Bike: S4Rs
Posts: 319
Quote:
Originally Posted by Mr Gazza View Post
Do Bears live on the Norfolk Broads? Of course! I have polished the headers on all my Ducatis. I also like to take the anodising off the silencers and polish the sleeves.

Best to use the right soaps for the different metals and have dedicated mops for each soap.
I get my metal polishing supplies from https://www.metalpolishingsupplies.co.uk/

I got the 5L kit from Gateros https://www.gaterosplating.co.uk/ind...product_id=207

In addition I bought plastic tubs for the etching and rinsing chemicals. I think I got 3L tubs and then 5L ones. The chemical goes in the small tub and then that sits in the bigger one which is filled with hot water so the inner tub is warmed.
I also bought shed loads of de-ionised water.
I thought the current regulator that was supplied with the kit was a recipe for disaster, so I also bought one of their "power box" thingies so I have a better handle on the current.
Come to think of it I also got some polyester filter bags for the Nickel ingots, so bear in mind that the kit is a basic starter.. I still recommend it though.
You get through quite a bit of copper wire striped from domestic cable too.

Incidentally I also bought a small bar of pink soap for Chrome. This does actually work very well at bringing up old chrome, so long as it hasn't started to flake. The bonus is that will also really set off the fresh bright nickel plating with a light buff and make it even more like Chrome.

As Buzzer said, it's all rather time consuming, but very absorbing and rewarding.
Hahahaha,that's you bookmarked for future use
walkingpictures is offline   Reply With Quote
Old 01-08-2020, 06:24 PM   #25
buzzer
Registered User
 
buzzer's Avatar
 
Join Date: Jun 2018
Location: Wolverhampton
Bike: M900
Posts: 392
some very useful information there Mr Gazza! some of which I will be using!

one think I have found quite effective is using a cheap fish tank pump to bubble air through the solution to agitate it...
buzzer is offline   Reply With Quote
Old 01-08-2020, 09:02 PM   #26
Mr Gazza
Lord of the Rings
 
Mr Gazza's Avatar
 
Join Date: May 2013
Location: Norwich
Bike: M900sie
Posts: 5,795
Thank you buzzer, I think that proves you can learn from a fool?

I have had a windscreen washer pump earmarked for circulating the electrolyte through a fuel filter. Might give it a try on the next batch.
__________________
Mr Gazza is offline   Reply With Quote
Old 08-08-2020, 04:22 PM   #27
buzzer
Registered User
 
buzzer's Avatar
 
Join Date: Jun 2018
Location: Wolverhampton
Bike: M900
Posts: 392
Now for the nice bit… putting it all back together! the frame came back from the powder coaters and as ever its a superb job! I know its a 50 mile round trip to this guy but his work is worth it, especially after the poor jobs I have had done in the past at local companies… Must be the easiest engine to put in a frame!

buzzer is offline   Reply With Quote
Old 13-08-2020, 05:43 PM   #28
buzzer
Registered User
 
buzzer's Avatar
 
Join Date: Jun 2018
Location: Wolverhampton
Bike: M900
Posts: 392
More progress... no holiday, and no pressure to go out means more garage time... its a good job I have this project or I would be climbing the walls by now!


buzzer is offline   Reply With Quote
Old 13-08-2020, 05:56 PM   #29
walkingpictures
preneolithic frebie
 
walkingpictures's Avatar
 
Join Date: Sep 2002
Location: Cambridge
Bike: S4Rs
Posts: 319
Nice to see it coming together Tony,looking good mate
walkingpictures is offline   Reply With Quote
Old 16-08-2020, 01:27 PM   #30
buzzer
Registered User
 
buzzer's Avatar
 
Join Date: Jun 2018
Location: Wolverhampton
Bike: M900
Posts: 392
Quote:
Originally Posted by walkingpictures View Post
Nice to see it coming together Tony,looking good mate

Thanks!

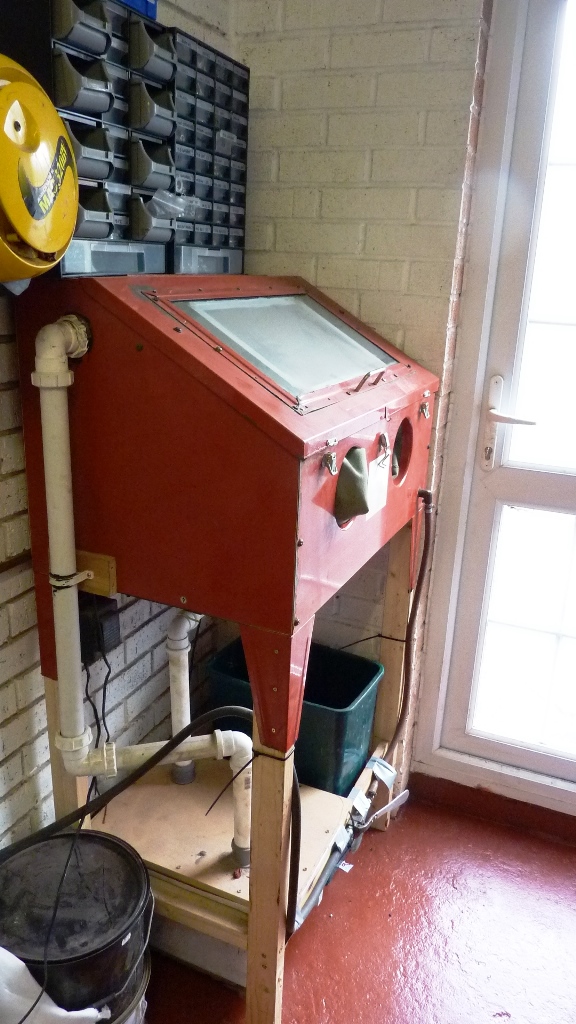
One of the benefits of having a blast cabinet is the ability to clean parts up easily... But I have always struggled to get that nice shiny finish the professionals manage to get with glass bead. I went to the bead supplier a while ago and said that I was having problems, and he asked what pressure I was blasting at, to which I replied 120 PSI. he said that's your problem... its too high and you are shattering the glass beads and the broken beads are giving you a matt finish! he said to turn the pressure right down, and then up until you got the finish you want! its so much better, you can see the difference in the reservoir caps! it also gives a closed finish that dirty finger prints just wipe off, on the matt surface they are difficult to remove!


buzzer is offline   Reply With Quote
Reply


Posting Rules
You may not post new threads
You may not post replies
You may not post attachments
You may not edit your posts

BB code is On
Smilies are On
[IMG] code is On
HTML code is Off

Forum Jump


All times are GMT. The time now is 02:27 AM.

vBulletin Skins by vBmode.com. Powered by vBulletin® Version 3.8.3
Copyright ©2000 - 2024, Jelsoft Enterprises Ltd.