UK Monster Owners Club Forum » .: Technical :. » Mods & How To's » About to start a 750 refresh...

Reply
 
Thread Tools Display Modes
Old 13-09-2018, 05:49 PM   #91
utopia
No turn left unstoned
 
utopia's Avatar
 
Join Date: Jun 2010
Location: leicester
Bike: M750
Posts: 4,545
Thinking this through a bit more, I reckon what I'd do would be to get a bolt the same size as the rivnut, fit it with a nut, followed by a decent washer (or two) then screw the whole lot into the rivnut by 5 or 6 threads.
Thus you would end up with a washer next to the swingarm/rivnut, then the nut, then the bolt.
I think if you hold the head of the bolt and tighten the nut down against the swingarm and washer, you should then be able to tighten the nut further (while still holding the bolt head) and this should draw the rivnut tight.
Then you can either drill it out and replace it or simply leave it alone and continue to use the old one.

Similar techniques for rivnuts are described on youtube .. its worth a look before you start, just to verify the method and familiarise yourself with how to do it.
....the method that I suggested above is just off the top of my head, but I think its about right.
If you do fit a new one, you could use the same technique to fit that, saving the expense of buying a rivnut gun.
utopia is offline   Reply With Quote
Old 13-09-2018, 07:13 PM   #92
Flip
Registered User
 
Flip's Avatar
 
Join Date: Mar 2010
Location: Beachtown
Bike: M900
Posts: 2,188
Yes they are definitely 'Rivnuts' that hold the hugger on and they are the type that sit a little proud of the surface they are fitted into.

I use them a lot at work and they basically work in the same principle as pop rivets meaning you need to be a little mindful of the thickness of the material you are fitting them into to ensure A- they grip correctly and B- they are not overly pulled so as to squash down too much. But it's not really rocket science if you have a bit of 'feel' for how tight things should be.

Quote:
Originally Posted by Darkness View Post
Thanks for clearing that up. As I said, I don’t have that fitment of hugger on mine so assumed it was the same as side panels.

Out of interest, any idea why it needs Rivnuts there rather than WellNuts?
The later front mudguards suffice with four plastic straps to hold them on.
I think you have just hit the nail on the head as 'Well Nuts' are generally used when a degree of cushioning is required or controlled vibration is allowed so the risk of fractures are reduced. Such as fairing and side panel brackets.

Whereas in the case of the hugger a shouldered screw is used for fixing where the shoulder fits into an oversized hole in the hugger meaning that when it is tightened (assuming it has been aligned correctly) the screw tightens fully onto the slightly proud lip of the Rivnut fitted into the swing arm.


Quote:
Originally Posted by utopia View Post
Thinking this through a bit more, I reckon what I'd do would be to get a bolt the same size as the rivnut, fit it with a nut, followed by a decent washer (or two) then screw the whole lot into the rivnut by 5 or 6 threads.
Thus you would end up with a washer next to the swingarm/rivnut, then the nut, then the bolt.
I think if you hold the head of the bolt and tighten the nut down against the swingarm and washer, you should then be able to tighten the nut further (while still holding the bolt head) and this should draw the rivnut tight.
Then you can either drill it out and replace it or simply leave it alone and continue to use the old one.

Similar techniques for rivnuts are described on youtube .. its worth a look before you start, just to verify the method and familiarise yourself with how to do it.
....the method that I suggested above is just off the top of my head, but I think its about right.
If you do fit a new one, you could use the same technique to fit that, saving the expense of buying a rivnut gun.
I would probably give this a go too if I didn't already have a Rivnut tool but when an unbranded one can be picked up, complete with a full range (M3-M8) of Rivnuts for less than £15 (or a Sealey branded one for just over £20 and an Eclipse at around £35) you might as well buy the tool and give the existing one a little pinch up.

https://www.ebay.co.uk/itm/86Pcs-Thr...kAAOSwFUlahn4X

You'll be surprised where else you'll find a use for them too.
__________________
You're perfect, yes, it's true- But without me you're only you!

Last edited by Flip; 13-09-2018 at 07:16 PM..
Flip is offline   Reply With Quote
Old 14-09-2018, 02:44 PM   #93
davkyt
Guest
 
Posts: n/a
I’m sure I’ll find a use for the well nuts I’ve ordered.....🤔
  Reply With Quote
Old 24-09-2018, 01:26 PM   #94
davkyt
Guest
 
Posts: n/a
My wheels and frame are going for paint this weekend.
The wheels have discoloured quite a lot and look kind of green. I’m not sure if someone has had a go at them in the past.

My question is.... are my wheels supposed to be the same silver as my tank but with a satin finish?
  Reply With Quote
Old 03-11-2018, 09:14 PM   #95
davkyt
Guest
 
Posts: n/a
Thoughts on the paint job?

[IMG] [/IMG]

https://postimg.cc/gallery/dwt4ryrg/

Last edited by davkyt; 04-11-2018 at 02:26 PM..
  Reply With Quote
Old 03-11-2018, 09:52 PM   #96
dk1six
Guest
 
Posts: n/a
Red or silver I'm thinking but you might want to consider what you're doing to the rest of the painted parts
  Reply With Quote
Old 04-11-2018, 07:36 AM   #97
fingerpuk
Guest
 
Posts: n/a
Just found this thread, paint looks great. Wish I could see all the earlier photos.
  Reply With Quote
Old 04-11-2018, 09:15 AM   #98
davkyt
Guest
 
Posts: n/a
It’s supposed to be this colour and finish


Last edited by davkyt; 04-11-2018 at 09:19 AM..
  Reply With Quote
Old 04-11-2018, 09:25 AM   #99
davkyt
Guest
 
Posts: n/a
I don’t know why i can’t get the pics any bigger......

You may or may not notice that the gold is too dark and the lacquer is to glossy......

I don’t know whether to go with it or strip it and start again.....
  Reply With Quote
Old 04-11-2018, 09:40 AM   #100
Darkness
.
 
Darkness's Avatar
 
Join Date: May 2007
Location: Stockbridge
Bike: M900
Posts: 1,984
Quote:
Originally Posted by davkyt View Post
.....the gold is too dark and the lacquer is to glossy......

I don’t know whether to go with it or strip it and start again.....
What paint shade have you used?

Keeping it really depends whether you like it, and what you are trying to achieve?

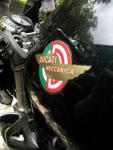
If you want a perfect match to original paint that’s a slippery slope as the gold frame paint doesn’t seem to be all the same on the earliest Monsters with black wheels. It was a different then, more champagne shade of gold on the next Monsters (With silver wheels), then went silver, black, or all sorts. 916s are completely different too,

For mine I matched the original paint I found under the Type Approval plate riveted to the frame, but that showed the rest of the frame paint had lightened where exposed to sun and air. 1990s paint clearly wasn’t completely colour stable.

If you like the paint you’ve got, just keep a swatch sample handy when choosing complementary and contrasting colour shades for everything else.

‘Lacquer too glossy’ can be fixed by being gently flatted back and over-sprayed with a coat of semi-gloss.
__________________
Original and Best since 1993

Last edited by Darkness; 04-11-2018 at 09:47 AM..
Darkness is offline   Reply With Quote
Old 04-11-2018, 09:43 AM   #101
Darren69
Transmaniacon MOC
 
Darren69's Avatar
 
Join Date: Sep 2013
Location: Sutton In Ashfield
Bike: Multiple Monsters
Posts: 6,022
I think you're posting the thumnail links instead of the hotlink:-

__________________
Roast Beef Monster!

Termignoni and Bucci - Italian for pipe and slippers!

S4 Fogarty, S4R 07T, 748, Series 1 Mirage
Darren69 is offline   Reply With Quote
Old 04-11-2018, 10:20 AM   #102
davkyt
Guest
 
Posts: n/a
@ Darkness...

It is beautiful.... and I do like it. The gloss upsets me more than the colour.
If I could easily/cheaply get it Matt without having to strip it and start again then I’d go for that.

The guy matched the colour to a book of Ducati colours he had. He convinced me that my paint had aged and was the reason for not getting an exact match.
After I got it blasted and a coat of powder primer applied i took it to him, with the wheels.
So he had the wheels to match the lacquer too.
He still has the wheels and assures they are perfect.

Decisions decisions....
  Reply With Quote
Old 04-11-2018, 11:00 AM   #103
Darkness
.
 
Darkness's Avatar
 
Join Date: May 2007
Location: Stockbridge
Bike: M900
Posts: 1,984
Something to bear in mind is how little of the frame is visible if you keep the standard side panels, especially if you keep the high level silencers. You are looking at a lot of new gold paint at the moment and little else.
I’d be tempted to keep it as it now is, but go for a mirror polish on the exhausts and a few selected parts to throw it into relief, but for going on with would loose fit the tank, saddle and saddle cover to see the contrast. Laying the fork uppers alongside too would show the contrast with them as well for a fuller range of colours on the finished bike.
__________________
Original and Best since 1993
Darkness is offline   Reply With Quote
Old 04-11-2018, 11:48 AM   #104
Albie
Fanactical volunteer
 
Albie's Avatar
 
Join Date: Oct 2003
Location: Kent
Bike: M900
Posts: 9,030
My penny worth. Leave it be. Looks very nice. If I were you and unhappy trial somewhere unseen with a green scourer ( just a single pass or two ) to take the polish off the top and leave it alone after. It will naturally dull anyhow I reckon.
Albie is offline   Reply With Quote
Old 04-11-2018, 12:01 PM   #105
davkyt
Guest
 
Posts: n/a
I suppose I could class this as a trial run for when I re do it in another 20 years time.

It’s just a shame with how much time I put into making sure I had the exact colour....
  Reply With Quote
Reply


Posting Rules
You may not post new threads
You may not post replies
You may not post attachments
You may not edit your posts

BB code is On
Smilies are On
[IMG] code is On
HTML code is Off

Forum Jump


All times are GMT. The time now is 10:41 PM.

vBulletin Skins by vBmode.com. Powered by vBulletin® Version 3.8.3
Copyright ©2000 - 2024, Jelsoft Enterprises Ltd.