UK Monster Owners Club Forum » .: Technical :. » Mods & How To's » Slow Monster rebuild

Reply
 
Thread Tools Display Modes
Old 04-01-2018, 08:55 AM   #466
Darren69
Transmaniacon MOC
 
Darren69's Avatar
 
Join Date: Sep 2013
Location: Sutton In Ashfield
Bike: Multiple Monsters
Posts: 6,022
Quote:
Originally Posted by Darkness View Post
Richard, when you go to the page with the list of messages received it defaults to 'Inbox', but click on the box which says 'Inbox' and it gives the other options, including sent messages.
Easy, but only when you know where to look!
Happy New Year, and on with the build.
Mine never shows the sent messages when I do that, it only shows the number of sent messages not the messages themselves.
__________________
Roast Beef Monster!

Termignoni and Bucci - Italian for pipe and slippers!

S4 Fogarty, S4R 07T, 748, Series 1 Mirage
Darren69 is offline   Reply With Quote
Old 04-01-2018, 02:05 PM   #467
Darkness
.
 
Darkness's Avatar
 
Join Date: May 2007
Location: Stockbridge
Bike: M900
Posts: 1,984
The drop down shows the number of sent messages, but click on that and the listing of messages beneath transforms to the sent messages instead of the in box.
Mine does anyway: just went back to make sure.
__________________
Original and Best since 1993
Darkness is offline   Reply With Quote
Old 04-01-2018, 02:18 PM   #468
350TSS
Too much time on my hands member
 
350TSS's Avatar
 
Join Date: Jan 2013
Location: Shipbourne
Bike: M900
Posts: 1,419
350TSS is offline   Reply With Quote
Old 04-01-2018, 02:19 PM   #469
350TSS
Too much time on my hands member
 
350TSS's Avatar
 
Join Date: Jan 2013
Location: Shipbourne
Bike: M900
Posts: 1,419
350TSS is offline   Reply With Quote
Old 04-01-2018, 02:20 PM   #470
350TSS
Too much time on my hands member
 
350TSS's Avatar
 
Join Date: Jan 2013
Location: Shipbourne
Bike: M900
Posts: 1,419
Thanks guys, my PM didn’t go after all.
Kids back at school, wife back at work next week so I will be able to absent myself guiltlessly to the garage and move forward.
Jobs for next week are:
1. Make a wiring jig to be able to run the wires and test them off the bike – estimate 4 hours
2. Start on the easy wiring circuits that I am confident with and lay them out, determining connector positions and terminating them.
3. Buy second hand S4 rear wheel spindle, nut, adjuster plates and adjuster blocks.
4. Make the frame for the front mudguard carbon fibre mold (been avoiding this one as it is not easy, the pattern is a later model 750/900 SS which provides frontal protection for the chrome legs) - estimate 6 hours.
5. Do one last (I hope) fill and rub down cycle on all other the CF molds (14) - estimate 6 hours.
Meanwhile the postman today brought these bits of titanium bar, 20mm for swinging arm spindle (350g) and 12mm (110g x 2) for engine bolts (one still in post), which I am not looking forward to running a die down. Equivalent steel items would weigh 610g and 192g respectively. So, I will have saved circa 424g at a cost of 16.7p per gram (not including any cost of my time in cutting to length and threading the engine bolts).
This is getting obsessional/expensive.
350TSS is offline   Reply With Quote
Old 04-01-2018, 04:08 PM   #471
slob
.
 
slob's Avatar
 
Join Date: Jul 2003
Location: East London
Bike: Multiple Monsters
Posts: 9,710
Good luck with the die! If you have any way to cut these threads on your lathe, do it!
Titanium work hardens 'like a bitch' and tapping is a strange mix of cutting and extrusion.
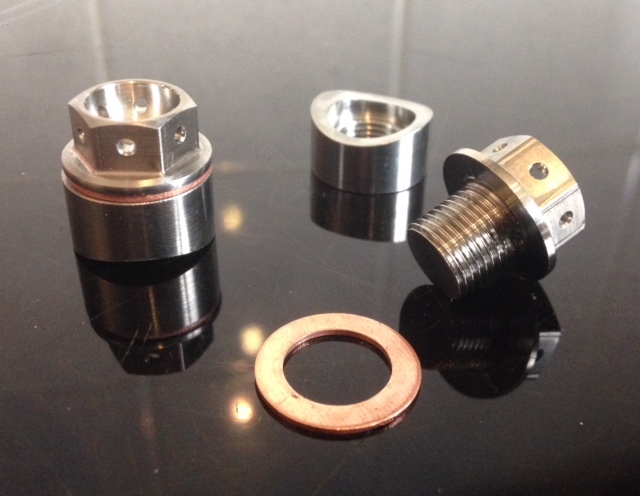
I had to make some 1/8 BSP lambda sensor plugs/bosses and only have a metric lead screw. The plugs were M10 race bolts turned down and I managed to hold the die stock in a vise and use a long breaker bar to turn the bolts... only just... it was seriously hard work after the first turn, despite cutting fluid everywhere.
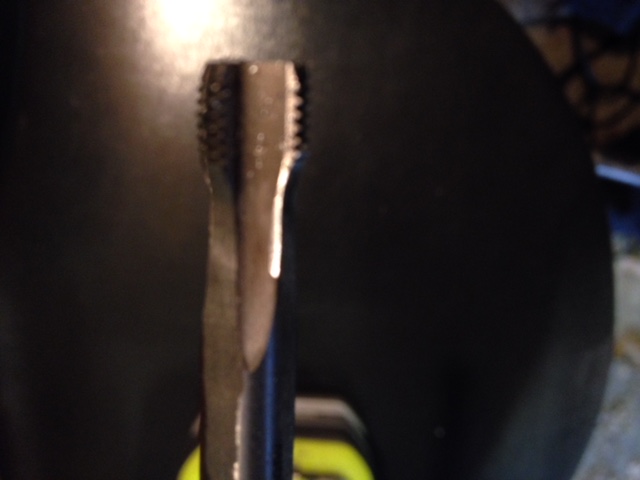
I looked for a spiral tap designed for stainless etc. to do the bosses but the price as stupid. I ended up grinding down a second cut tap with a Dremel, to reduce the lands and enlarge the flutes, which reduced the friction enough for me to blast through with the tap in an 18V drill. Turning down the bosses with a carbide tool was child's play by comparison.


Last edited by slob; 04-01-2018 at 04:22 PM..
slob is offline   Reply With Quote
Old 04-01-2018, 07:06 PM   #472
Capo
You Are What You Is
 
Join Date: May 2005
Location: A Foward Location
Bike: S4r
Posts: 1,948
Titanium does not make a good bearing surface.
Capo is offline   Reply With Quote
Old 04-01-2018, 07:42 PM   #473
slob
.
 
slob's Avatar
 
Join Date: Jul 2003
Location: East London
Bike: Multiple Monsters
Posts: 9,710
What’s the answer Stewart? DLC coating?
slob is offline   Reply With Quote
Old 04-01-2018, 08:17 PM   #474
Capo
You Are What You Is
 
Join Date: May 2005
Location: A Foward Location
Bike: S4r
Posts: 1,948
Quote:
Originally Posted by slob View Post
What’s the answer Stewart? DLC coating?
Yes I DLC coated mine, it looked OK at the last inspection
Capo is offline   Reply With Quote
Old 04-01-2018, 08:46 PM   #475
350TSS
Too much time on my hands member
 
350TSS's Avatar
 
Join Date: Jan 2013
Location: Shipbourne
Bike: M900
Posts: 1,419
Pardon my ignorance but what is DLC?
350TSS is offline   Reply With Quote
Old 04-01-2018, 08:59 PM   #476
slob
.
 
slob's Avatar
 
Join Date: Jul 2003
Location: East London
Bike: Multiple Monsters
Posts: 9,710
Diamond Like Carbon.

what you *should* be seeing instead of chrome on black fork stanchions, although apparently most black forks are actually black TiN (normally gold coloured) rather than the real deal.
slob is offline   Reply With Quote
Old 05-01-2018, 06:09 AM   #477
Capo
You Are What You Is
 
Join Date: May 2005
Location: A Foward Location
Bike: S4r
Posts: 1,948
Clutch push rod
Swing arm spindle
Rocker spindle


Capo is offline   Reply With Quote
Old 05-01-2018, 06:37 AM   #478
slob
.
 
slob's Avatar
 
Join Date: Jul 2003
Location: East London
Bike: Multiple Monsters
Posts: 9,710
Quote:
Originally Posted by 350TSS
... how do you know if it has gone - all I can see on that page is replies sent to me - not what I have (or have not) sent ...
http://ukmonster.co.uk/monster/showthread.php?t=56003
slob is offline   Reply With Quote
Old 05-01-2018, 06:45 AM   #479
Kato
Dismantled
 
Kato's Avatar
 
Join Date: Feb 2006
Location: East Molesey
Bike: Multiple Monsters
Posts: 2,222
Coating Process
The product is placed into the vacuum chamber on a carousel and the chamber is evacuated. The product is preheated to a low processing temperature around 150 c. The preheating phase of the process conditions the substrate for the coating and will ensure that all of the moisture absorbed by the material has been outgassed before the deposition process begins.

After the preheat cycle is complete, the process transitions into the ion etching phase where product is bombarded with ions from argon gas to scrub or sputter clean the surface and remove micro oxides. This scrubbing of the surface with ions cleans the surface and improves the adhesion of the coating to the substrate.
After the substrate has been sputter cleaned, the process transitions into the coating phase. If an initial layer (underlayer) is needed to improve the performance of the product in the final use, the high energy sputtering process is used to deposit a dense well adhered smooth underlayer. As the underlayer coating reaches the proper thickness, the process transitions into the DLC coating step which deposits a dense, smooth amorphous carbon hydrogenated layer onto the product’s surface.

Coating Phase
During the DLC coating phase of the process, a carbon carrying gas is introduced into the chamber. This gas is the source for the amorphous carbon DLC coating. The carbon carrying gas introduced into the chamber is ionized by auxiliary anodes and undergoes what is referred to as “cracking” or separating of the hydrogen and carbon in the gas. The ionized hydrogen and carbon atoms in the gas are drawn to the surface of the product with an electrical charge that is applied to the carousel.

Final steps
The carousel that has the electrical charge applied and is carrying the product to be coated is also rotating in the chamber and draws the ionized carbon/hydrogen ions to the surface of the product forming the amorphous carbon or diamond like carbon film.
__________________
"Political correctness is just intellectual colonialism and psychological fascism for the creation of thought crime"

Kato is offline   Reply With Quote
Old 05-01-2018, 08:33 AM   #480
utopia
No turn left unstoned
 
utopia's Avatar
 
Join Date: Jun 2010
Location: leicester
Bike: M750
Posts: 4,545
[QUOTE=slob;550298]Good luck with the die! If you have any way to cut these threads on your lathe, do it!
Titanium work hardens 'like a bitch'.

I'll second that for sure.
Even just turning titanium is tricky
...for which you'll need to use slow speed and heavy feed, with plenty of lube.
Give the tool plenty of work to do ie one bigger cut is far better than two smaller ones.
Try to hit finished size without the need for a final skim.

If your lathe can screwcut, but like mine will only do imperial threads, I would even consider half-cutting the threads in the nearest imperial pitch, then running the die down to finish off. (only works for short threads, obviously)
This will have the added advantage of keeping the threads true to the axis, which is almost impossible with a hand-held die.
Oh, and if you're buying a die, make sure you get a split one .. many modern ones seem to be solid, which makes thread sizing a lottery.

Another option if your lathe will only cut imperial threads might be to have an imperial threaded spindle and buy some imperial nuts for it ....?
I was considering doing this myself.

Failing all of the above, you could always talk to Ti-Pete.
We can supply contact details.
He made the items in Capo's pic. (and is a thoroughly nice guy .. but he may have a long waiting list).

ps.
an afterthought ... are you using solid bar, as opposed to hollow, for the spindle ?
If so, the weight saving will not be maximised.
Mind you, I'm not sure that Ti hollow barstock is very easy to find.
Don't even think about drilling it over that length (though I guess you could just drill the ends as far as you can).
utopia is offline   Reply With Quote
Reply


Posting Rules
You may not post new threads
You may not post replies
You may not post attachments
You may not edit your posts

BB code is On
Smilies are On
[IMG] code is On
HTML code is Off

Forum Jump


All times are GMT. The time now is 04:41 AM.

vBulletin Skins by vBmode.com. Powered by vBulletin® Version 3.8.3
Copyright ©2000 - 2024, Jelsoft Enterprises Ltd.