Register | FAQ | Members List | Calendar | Today's Posts | Search | Contact |
|
Registered
Members: 673 | Total Threads: 50,934 | Total Posts: 519,365 Currently Active Users: 1,143 (0 active members) Please welcome our newest member, Mozzer46 |
|
|
Thread Tools | Display Modes |
06-04-2018, 11:54 AM | #646 |
No turn left unstoned
Join Date: Jun 2010
Location: leicester
Bike: M750
Posts: 4,559
|
That's gratifyingly cheap actually.
If they are actually rated as single use, I would agree that replacement makes loads of sense, at that price. Funnily enough, belts sawing through covers was the reason I had to disturb mine. But this was down to a drive pulley with a manufacturing fault. Lucky I spotted it, shortly after buying the bike with 2k miles on it. Previous mechanics (two previous belt changes) had somehow managed to overlook the piles of black dust behind the covers and the grooves sliced into the plastic. |
11-04-2018, 06:34 PM | #647 |
Too much time on my hands member
Join Date: Jan 2013
Location: Shipbourne
Bike: M900
Posts: 1,422
|
Kids on half term so not much progress this last week, also my tendency to flit from job to job (never actually finishing any that I start) means that there is not much to add to this saga.
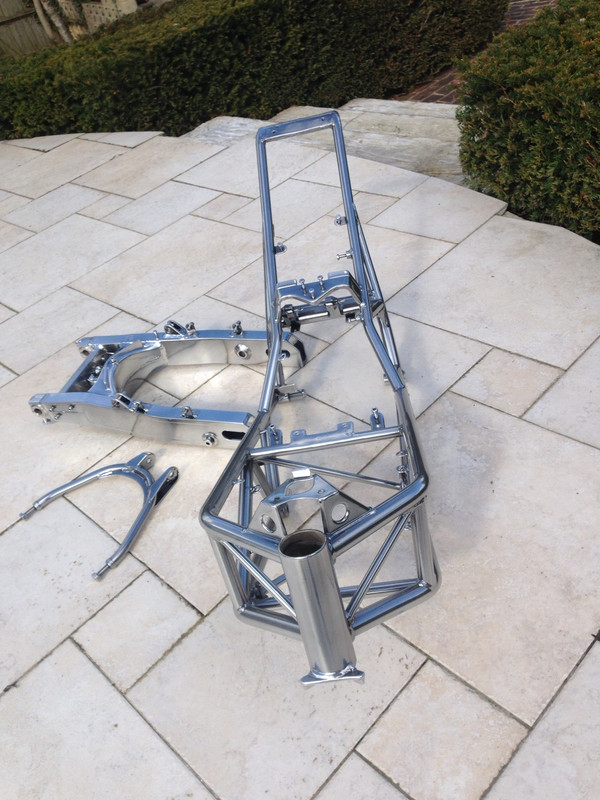
Whilst they are on holiday I am limited to short one-hour bursts in the garage as I have to ensure that they are not wasting their lives on electronic devices and they are getting on with their exam revision. I did manage to make up some mould surrounds for the instrument nacelle and the battery box. The instrument nacelle one was made from the last of some purloined corrugated polypropylene board from a discarded estate agents board, the battery box from “proper” sheet material purchased from Easy Composites. upload pics Today, I welded 2 x 12mm nuts to the cam belt idler gear studs and managed to get them out, having previously dosed the studs with penetrating oil on a daily basis. Also, I did nearly finish polishing (as best I could with the barrels still in situ) all the hard to reach places on the engine cases with small brass wire brushes in the Dremel flexible drive. Before I get the etch primer out, I think I still need to thoroughly degrease the cases and I am not sure what to use. I have some Machine Mart de-greaser but I think this is detergent based and may leave a chemical film that might affect the primer adherence to the aluminium. An alternative is brake cleaner which should loosen all the hydrocarbons but getting every last molecule off the cases after the brake cleaner has evaporated is still a worry. Maybe the sequence should be brake cleaner followed by MM de-greaser and then a damp lint free cloth. What would others recommend? Also, I need to work out how to position the engine as I paint it, leaving it on its stand will mean that areas where the stand bolts to the engine will be masked and I will not be able to degrease these areas either. I am currently favouring making some steel straps to bolt to the inlet manifold studs and hanging the engine from the rafters on ratchet straps. I should be able to rotate the engine as I paint and elevate it sufficiently to get to the underside and sump. There will need to be a few hours-worth of careful masking-up to be done, rocker covers, cam bearing covers, gearbox and clutch shafts and oil and timing window seals etc., etc. Yesterday, I got a text from Aerocoat saying my frame, swinging arm and suspension hoop are ready, so I’ll pick them up next Tuesday – it’s a 6 hour, 340 mile, round trip. |
12-04-2018, 09:50 PM | #648 |
Too much time on my hands member
Join Date: Jan 2013
Location: Shipbourne
Bike: M900
Posts: 1,422
|
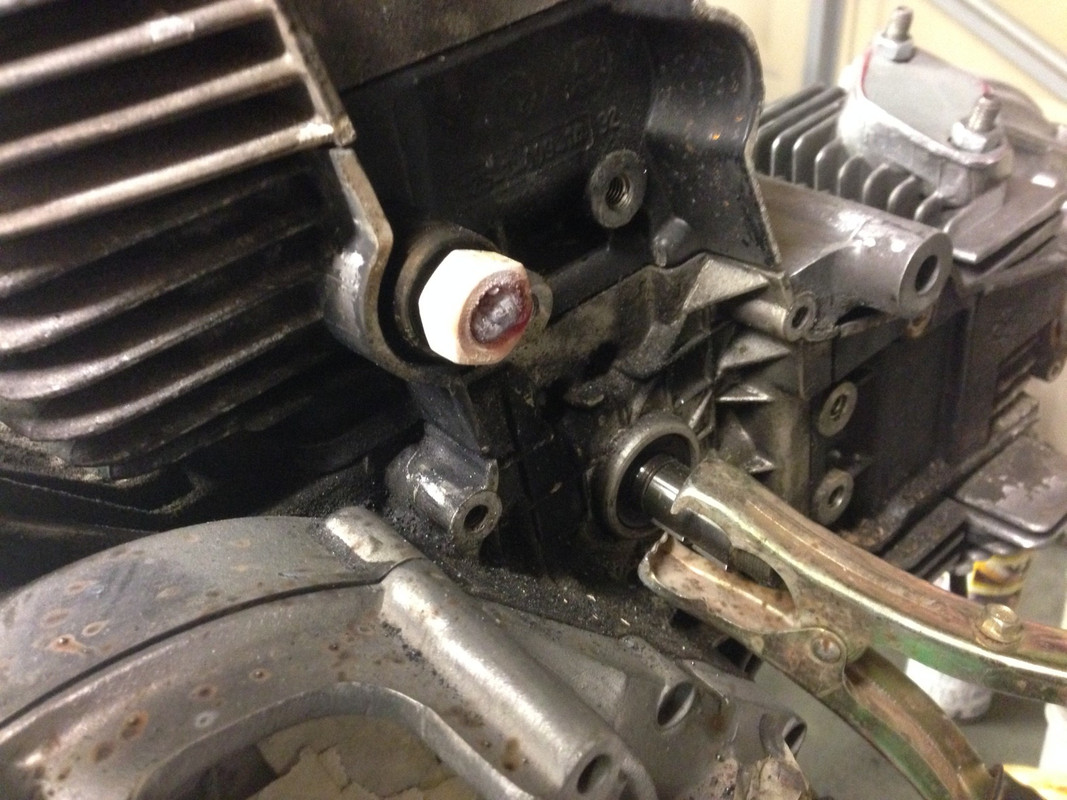
Finally finished preparing the motor for painting today, most of the day with a brass wire brush either in the electric drill or a much smaller version in the Dremel. I wore eye protection whilst doing this and glad I did because you could feel the detaching strands hitting your face. Alas, I think some must have attached to my shirt as after I took it off I got some in my eye which is still there as I write this.
Brake cleaning fluid alone was used to degrease, fortunately I had 3 aerosol cans as I used nearly all of them. We shall see tomorrow whether they worked. I then made up some straps from 25mm x 3mm steel flat to bolt to the inlet ports to use as lifting eyes. I then lost an hour as I could not work out how to release the ratchet strap which had previously held the steering head secure, I always struggle with ratchet straps – this one was ”coil bound” and a right bugger to open out Finally, I made up one AMP 2 wire male connector for the neutral switch. Only2 more 2 pole male connectors ( fuel sender and rear brake switch) and 1 x 5 pole male Rear light cluster) to complete all the AMP connectors in the loom. |
12-04-2018, 09:58 PM | #649 |
Fanactical volunteer
Join Date: Oct 2003
Location: Kent
Bike: M900
Posts: 9,034
|
Quote:
__________________
http://albies93m900.blogspot.co.uk/ |
12-04-2018, 09:58 PM | #650 |
Registered User
Join Date: Sep 2010
Location: Leics
Bike: M900
Posts: 2,894
|
You can get 5L containers of brake cleaner at Halfords etc. for not that much more than a can from some bike shops....
__________________
M900, 916, LeMans II. |
12-04-2018, 10:18 PM | #651 |
Too much time on my hands member
Join Date: Jan 2013
Location: Shipbourne
Bike: M900
Posts: 1,422
|
Dukedesmo: Thanks - Good to know, I have never used the stuff before and was well impressed with the way the oily stuff/grease dissolved and flooded my bench. I was using one of those jumbo rolls of paper towels and wiping it up before it evaporated then repeating two or three times. Hopefully good to go to etch primer
|
13-04-2018, 12:53 PM | #652 |
No turn left unstoned
Join Date: Jun 2010
Location: leicester
Bike: M750
Posts: 4,559
|
Too late now but .. I've used meths in the past for cleaning prior to paint.
It seemed to work very well and has the advantage of evapourating fairly slowly, so you can brush it around a bit. Mind you, it aint that cheap from regular outlets these days .. I get mine from the local pound shop. On the ratchet strap thing ... they're always hard/impossible to slacken when under tension. For this reason, I bought a small, 250kg chain hoist last year. Its been an absolute star for all kinds of lifting/ suspending jobs, being finely controllable with ease. Another advantage is that is eliminates the need for a headstock stand (and stores away more conveniently too). Should've got one years ago. |
13-04-2018, 01:27 PM | #653 |
Too much time on my hands member
Join Date: Jan 2013
Location: Shipbourne
Bike: M900
Posts: 1,422
|
Started today giving the engine one last dose of brake cleaning fluid and paper towelling, just to use up the remaining aerosol rather than because I thought it needed a further de-greasing. Then I put the convector heaters under the engine and put the etch primer aerosol can in hot water, having given it a good shake. I went back indoors and watched an episode of Project Binky on Youtube (25 mins) Two guys converting an original BL mini using a turbocharged 2 litre 4WD Toyota Celica power and drive train. If you’ve stayed with this thread this far then you will probably enjoy it.
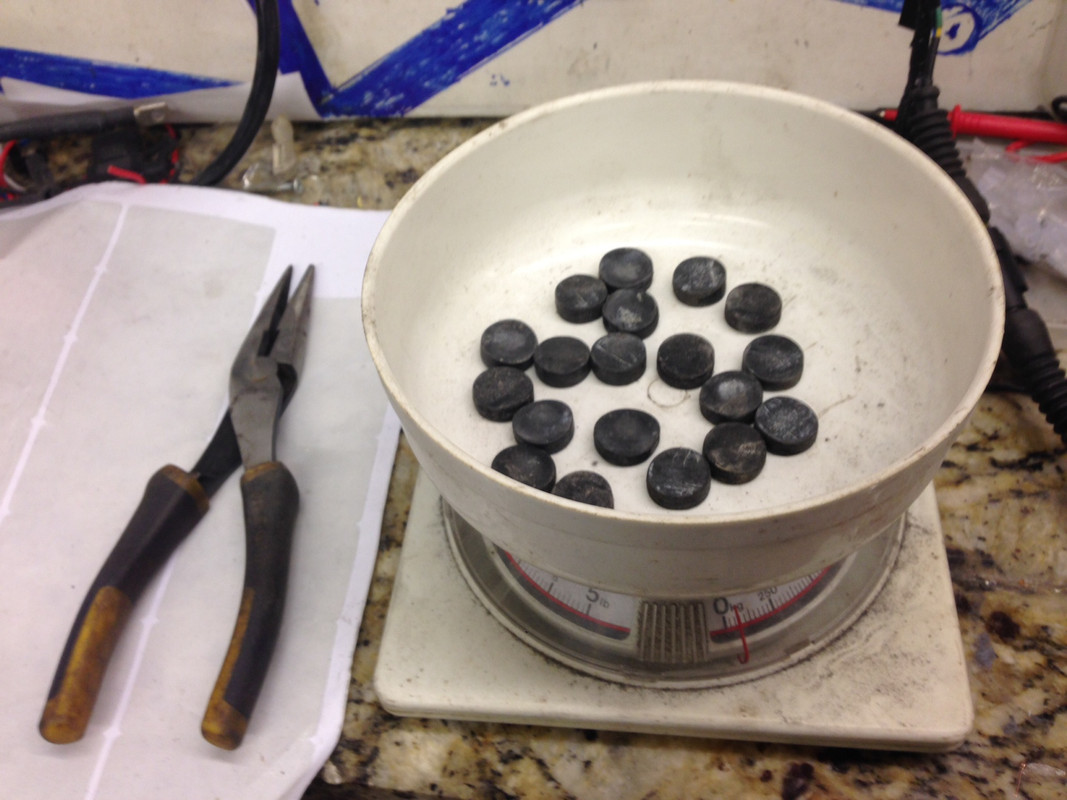
Albie: I think I had a full set of rubbers between the fins, thanks for spotting them – now removed and not going back so a full 25g weight saving. Note the works removal tool. Primed the motor and one tin 500ml of U pol etch primer just not quite enough, annoyingly by about 20ml. upload pic |
13-04-2018, 08:11 PM | #654 |
Too much time on my hands member
Join Date: Jan 2013
Location: Shipbourne
Bike: M900
Posts: 1,422
|
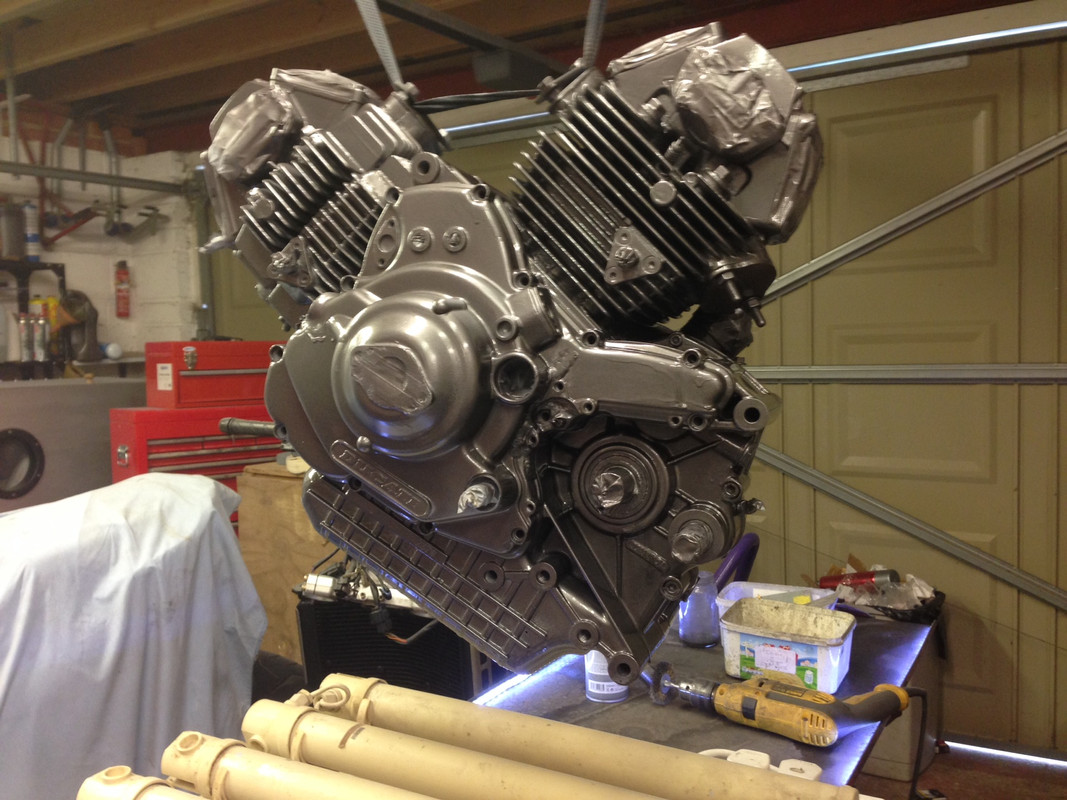
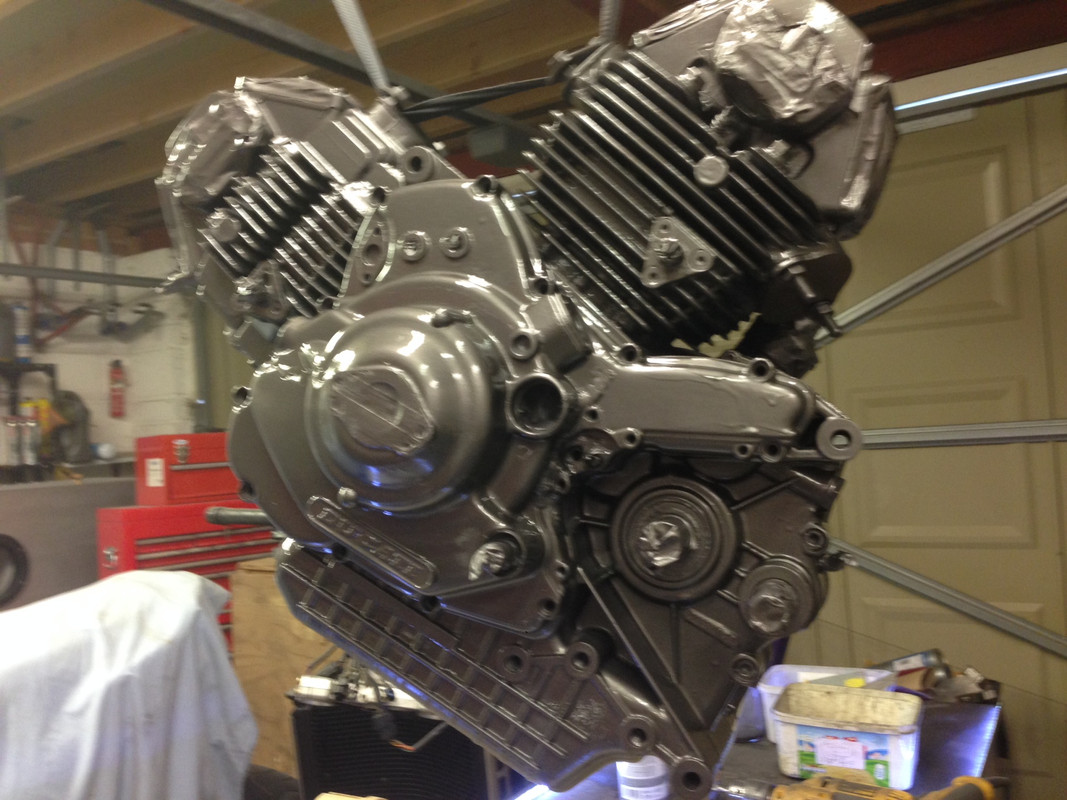
And here it is painted – colour is anthracite. I used Halfords wheel paint, which looking at the Safety data sheet is exactly the same formulation as Five Wheel Silver which others have had good results from.
I got 4 runs – one behind where the starter motor sits which can stay where it is and 3 on the alternator cover which I will have to do something about but I think I will let it bake hard first sitting over the convector heater. While I was waiting for the etch primer to go off sufficiently to apply the topcoat I knocked up a mould for the sprocket cover which I think I will do in carbon fibre. upload pic Between top coats I managed to make the only bullet connectors on the bike for the front indicators and made the male side of the rear brake light switch (AMP connector). All in all a good day despite the runs (paint type). Here it is after the second coat note runs on rear most top edge of alternator cover |
13-04-2018, 08:36 PM | #655 |
Pleasantly surprised!
Join Date: Nov 2016
Location: Stoke on Trent
Bike: M900ie
Posts: 780
|
Engine paint looks great!
__________________
Monsters don't hide under the bed, they sleep inside the shed |
14-04-2018, 11:04 AM | #656 |
Bronze Member
Join Date: Nov 2014
Location: Hondon de los Frailes
Bike: S4r
Posts: 293
|
Really nice job, love the engine colour, spot on attention to detail.
I watched all the 'project binky' amazing engineering and very entertaining. Keep up the good work fella. |
17-04-2018, 04:37 PM | #657 |
Too much time on my hands member
Join Date: Jan 2013
Location: Shipbourne
Bike: M900
Posts: 1,422
|
|
17-04-2018, 05:14 PM | #658 |
Too much time on my hands member
Join Date: Jan 2013
Location: Shipbourne
Bike: M900
Posts: 1,422
|
Decisions, decisions?????
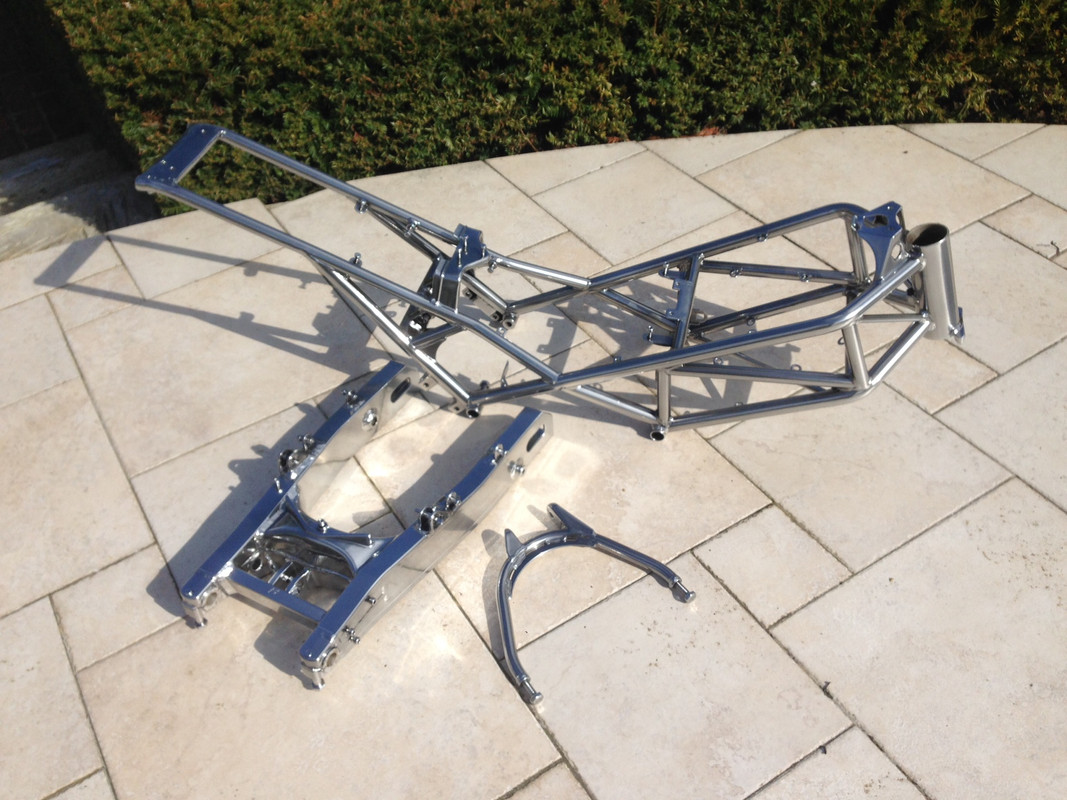
I am coming to the point where I need to decide what colour the body work is going to be (tank, seat mudguard, rear hugger, air scoops x 4, headstock infill panels etc) - it will be a lot of colour. The chrome look frame will go very nicely with black but black is definitely the hardest colour to paint and look good afterwards as it shows the minutest blemishes. Also, I am not sure if I can get black, edged with silver (rather than white) tank decals (same style as the lettering on the cambox bearing covers). Ducati Red would also look good and every body knows red bikes are faster. I am not a huge fan of stripes and if I am painting it this is just something else to go wrong. White would be easiest to paint but a bugger to keep looking good and it probably needs a bit of pearl in it to really stand out which is also a complication I do not want to contemplate as my final finish quality will probably be down to effort spent rubbing down rather than spray painting competence. i.e. plain colours with lots and lots of thin coats rubbed down with 1000/1500/2000 wet and dry. The final finish on pearl / metallic colours I think relies more on genuine spray painting ability. The other problem I have is I spotted on another thread here a polished alternator case on a GT1000 and it looks stunning and since my case did not come out 100% I am considering to stripping it back and polishing it or even giving it the Aerocoat treatment (with the clutch inner cover) which I think would look great against the anthracite crank cases. I wish I knew how to photoshop so I could work out which works best. The really mad option is to make two sets of all the CF stuff and paint one set red and the other black. Not really an option if I want to finish before they screw down the lid. What would you do? |
17-04-2018, 05:39 PM | #659 |
Registered User
Join Date: Aug 2011
Location: Southampton
Bike: M1100evo
Posts: 2,465
|
That frame is beautiful, Richard - what a top job and a very reasonable price. I can see Aerocoat getting some more business as a result of your experience!
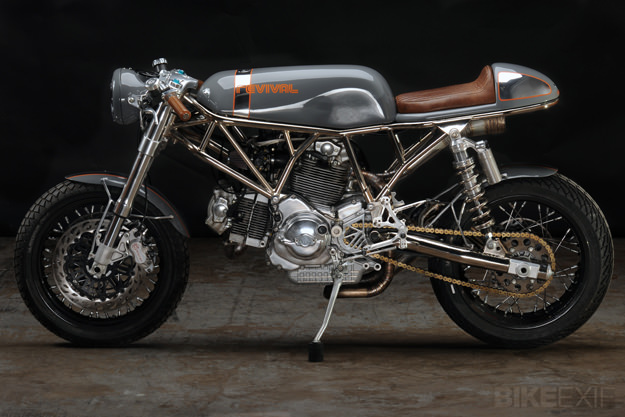
I remember seeing this customised sport-classic Ducati with grey paintwork, which went well with a nickel plated frame. It's also got those polished crankcases you like... http://www.bikeexif.com/revival-ducati-sportclassic |
17-04-2018, 06:14 PM | #660 |
Too much time on my hands member
Join Date: Jan 2013
Location: Shipbourne
Bike: M900
Posts: 1,422
|
That does look good - I follow that website as well as others and have noticed a recent fashion for pastel colours (light blue, light green, beige (Kiera Knightly bevel Chanel ad) or at least unusual colours such as the grey above). These will not go well "stylewise" with the amount of oil that is always under my fingernails (???)
|
|
|