Register | FAQ | Members List | Calendar | Today's Posts | Search | Contact |
|
Registered
Members: 673 | Total Threads: 50,934 | Total Posts: 519,365 Currently Active Users: 831 (0 active members) Please welcome our newest member, Mozzer46 |
|
|
Thread Tools | Rating: | Display Modes |
12-01-2015, 06:14 PM | #1 |
Guest
Posts: n/a
|
My M750 Rebuild
OK Guys'n'gals
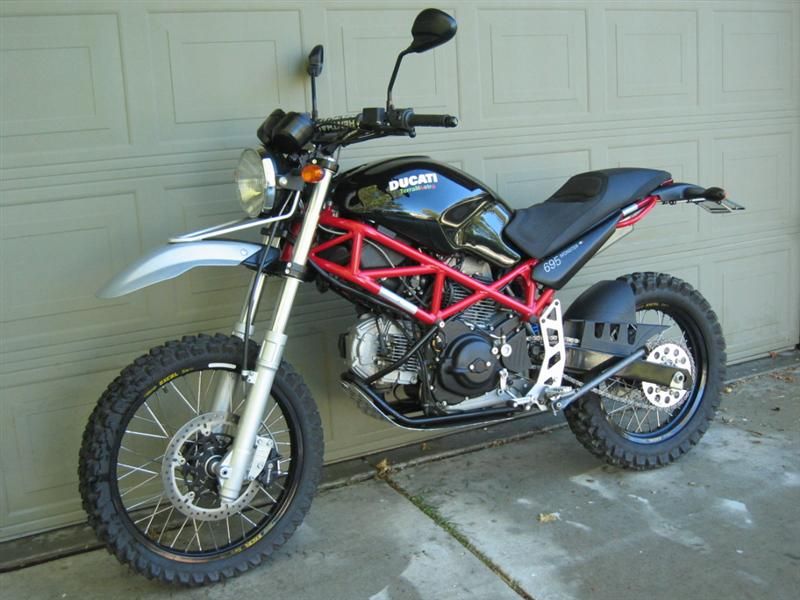
This is my 1997 M750. I've had it since 2005 and have decided to perform a bit of surgery on it in attempt to make it fit me a bit better. I'm 6'3" and have been told that I "look like a gorilla riding a moped" on it. I have been studying some of the Monster forums and custom bike sites for a while and have noticed that everyone is making cafe racers out these so I'm going to try and build a Scrambler out of it to take on the new Ducati Scrambler. I started this about 4 years ago but various things (job, wife, job, other bikes, job etc etc) have kept me off this project since then. Now my mates are taking the ****, so I foolishly gobbed off that it would be finished and rideable by the spring (of this year!!) I have limited mechanical abilities so anything I can't do (frame chop, exhaust fabrication) will have to be paid for and done by people who are not so cack handed as me!! I am sure I will bore you all asking lots of stoopid questions, a lot of which will be along the lines of "Where does this bit go?" This is where I was at when my mates started on me. I've stripped off most of the awful wiring, cut back the footrest hangers (it's going to be single seat) and had them, both wheels and rear brake-steady powder coated. I sprayed the fork leg bottoms and refurbed both calipers. Next move was to re-locate the fuse box from under the seat to where the air box was (Air box binned) I told you I had limited mechanical abilities, fuse box holder rough as f**k, but will be hidden (and smoothed and painted) Next I made up some intakes from rubber pipe and alloy tube (and the ever present jubilee clips) Will post this now in case I am breaching any upload limits To be continued........... (some time!) |
12-01-2015, 06:26 PM | #2 |
Bockloks
Join Date: Jan 2012
Location: London
Bike: No Bike Yet!
Posts: 4,601
|
Excellent stuff. Your pics are hosted elsewhere (photobucket) so go ahead and post as many as you like.
|
12-01-2015, 06:27 PM | #3 |
Anglo-Saxon Warrior
Join Date: Aug 2002
Location: North Yorkshire
Bike: M900
Posts: 2,485
|
Welcome and keep posting!
Yorkie
__________________
NO ICE, GUN IT! |
12-01-2015, 06:59 PM | #4 |
Guest
Posts: n/a
|
Part Two
OK, so next was to get the seat sub frame chopped. Too much for me, my attempts at welding are all snobs everywhere, so thanks to Lorenzo in Llangennech for his fabrication skills.
I cut the seat pan and started to shape the remaining foam. I ordered an LED brake light / indicator combo from China, which then needed more of my amazing fabrication skills to fit in place. The seat is still sitting a little too high so I have some more of the pan to chop off to lower it slightly. Check out the damage to the seat foam in the last picture, the seat had been living in my workshop (ie shed) for the last 3 year and a local mouse had obviously found it very tasty!! While Lorenzo was sorting out my frame, I decided to fill, sand and paint. There were a few small dents in the tank to be filled. Filler went in OK, primer was good, black top coat looked fine, but when the lacquer went on it dried with a slight crazing in the places where the filler was, underneath the OK coats of black and primer! Also paint doesn't seem to like carbon fibre mudguards, they are well pitted. I will have to do it again but I think it will have to wait for next winters work, I want to ride this now! I have also fitted some Renthal bars, higher than standard, and spot the Mk. 1 risers made by my best fabricating mate Lorenzo. So this is the current situation, the bike is now in Longlife exhausts in Swansea having a couple of very short (and hopefully very loud) "silencers" made up, photos when it comes back. To be continued...................................... |
12-01-2015, 07:04 PM | #5 |
Guest
Posts: n/a
|
Part Two A
|
12-01-2015, 08:42 PM | #6 |
Guest
Posts: n/a
|
I have a pair of the same handlebars as yours for my M600 current restoration, I couldn,t make my mind up about them, but after seeing yours on the bike I think I will use them. Not sure about the risers though. Full marks for having a go at the frame and seat, if your,e not happy with the way your seat turns out you could always look for an MV. F4 seat, they look great on a chopped frame. You should maybe have sprayed a BAR coat on the tank before the colour went on, I always use that now after having had similar paint crazing problems like the one you describe. If the temperature where you do you're spraying is anything like cool that will cause the crazing too. I,m liking the colour of your wheels too. I have started work on Utopia's old tank now, but being as my spray shop is in the back garden I will get the filler onto it then let it settle down till the spring before going in with the paint. I shall watch your thread with interest as you progress, you are obviously not averse to attacking it with the hacksaw. Nice one.
|
12-01-2015, 09:29 PM | #7 |
Registered User
Join Date: Sep 2010
Location: Leics
Bike: M900
Posts: 2,894
|
Interesting.
If you want to make the bike taller, get some ride height increasers from Louigimoto (or make your own) adds 25mm to the rear ride height and helps make it turn better too.
__________________
M900, 916, LeMans II. |
12-01-2015, 10:35 PM | #8 |
Lord of the Rings
Join Date: May 2013
Location: Norwich
Bike: M900sie
Posts: 5,963
|
I like the red disc on the brake pedal...Reminds me of a "Remove before Flight" tag on an aircraft..
Like the air filters too, reminds me of the intake roar on my 750SS. Like the loop on the seat rail too, much better than a tail chop but only if the seat pan fits the rail exactly. Regarding the crazing over the filler. I would go with Dookbob. I believe Bar coat is also known as Isolating primer.....Bit late now as you have the top coat on, but persevere with the lacquer in thin coats after the existing is WELL cured. I had the pitting in the Carbon, as have so many others. It is caused by pinholes in the carbon itself, formed at the layup stage. I found that the only cure was to brush on the two part lacquer...Same stuff I was trying to spray, but spraying won't fill the little holes. I used a brush sold in modelling shops for brushing on dope. The pin holes "bridged" after about 4 coats, flatting between. Then I could spray normally. ....Posted this up somewhere but I can't find my original thread..!! Edit....Found it.. http://www.ukmonster.co.uk/monster/s...+holes+lacquer Last edited by Mr Gazza; 12-01-2015 at 10:46 PM.. |
13-01-2015, 02:35 AM | #9 | |
Registered User
Join Date: Mar 2010
Location: Beachtown
Bike: M900
Posts: 2,188
|
Quote:
How 'Scrambler' do you want to go with it?? The rear frame 'hoop' looks a bit like how bikes 'used to be'
__________________
You're perfect, yes, it's true- But without me you're only you! |
|
13-01-2015, 09:46 AM | #10 |
Guest
Posts: n/a
|
|
13-01-2015, 01:12 PM | #11 |
Guest
Posts: n/a
|
Nice project
- I noticed right side of suspension hoop has scuff marks - is it catching the high mount exhaust? |
13-01-2015, 06:54 PM | #12 |
Guest
Posts: n/a
|
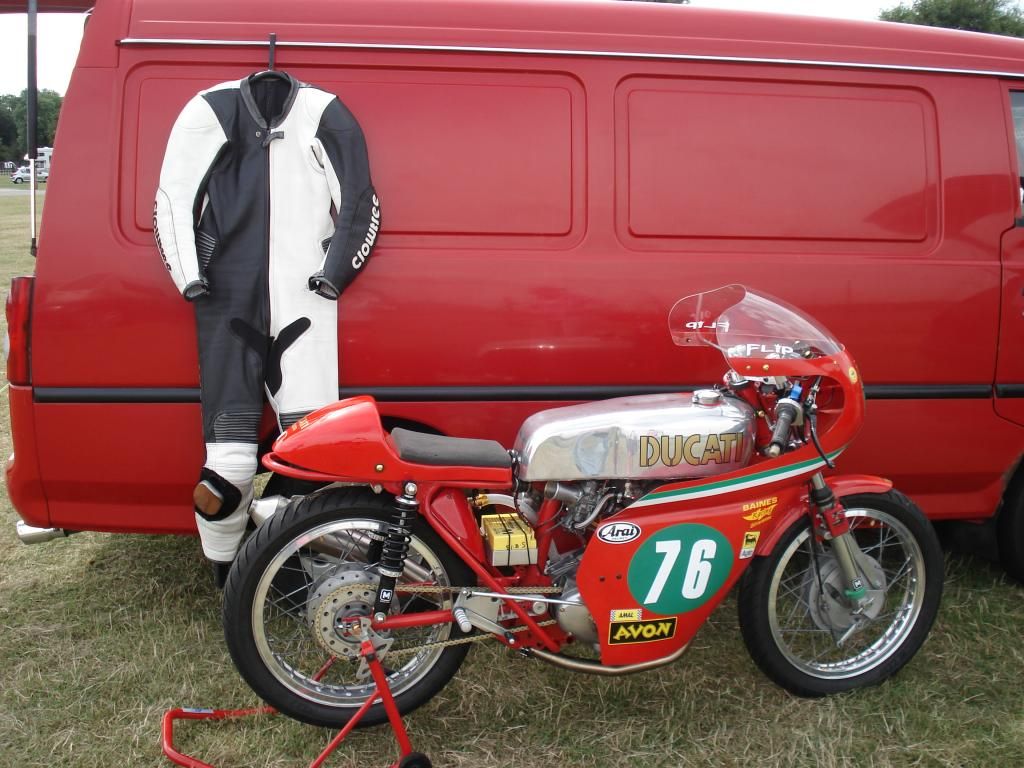
There are some realy nice bits of kit creeping onto this thread now, I love the little racer.
|
13-01-2015, 06:58 PM | #13 | |
Bockloks
Join Date: Jan 2012
Location: London
Bike: No Bike Yet!
Posts: 4,601
|
Quote:
|
|
13-01-2015, 07:56 PM | #14 |
Lord of the Rings
Join Date: May 2013
Location: Norwich
Bike: M900sie
Posts: 5,963
|
|
13-01-2015, 10:11 PM | #15 |
Guest
Posts: n/a
|
|
|
|