One of those jobs I've been saving for winter is changing the fuel filter on the Evo. Although the mileage isn't high, it's been in there for the best part of a decade so would probably benefit from being renewed. Strangely, there's no mention of changing the filter in the routine maintenance schedule in either the handbook or workshop manual. Also, I wanted to see if there were any signs of corrosion at all, (bearing in mind I've always used ethanol-free Esso Synergy Supreme+).
I thought I'd share what was involved, as it might be useful for anyone else who's considering doing this job (although I've got an Evo, it should be the same process for any 696/796/1100).
It's not a difficult task but it is more involved than it should be because of all the fasteners you have to remove before you can lift the tank.
So, firstly, remove the tank fairings and then undo the two screws attaching the tank to the frame (the one on the right just above the frame rail and the one on the underside of the tank above the rear exhaust header).
Pop the fuel lines out of their channels under the tank and disconnect the wiring plug.
Then lift the tank to gain access to the fuel pump cover. Now would be a good time to check the foil heat protector, which can break up over time. A replacement (46013682A) is only a couple of pounds from Moto Rapido.
Undo the two nuts and remove the cover revealing the fuel couplings underneath. Disconnect the couplings by squeezing the ring and pulling the connectors straight off. Mark the pipes so you know which is 'In' and which is 'Out'. Some fuel will escape from both the tank and pipe so have a bowl or rag underneath to catch any spillage.
You can now remove the tank and drain any remaining fuel into a suitable container.
To access the filter, simply remove the six screws attaching the flange to the tank (noting the position of the two special screws) and carefully extract the flange and fuel pump assembly. (Note that the screws are Loctited in, so will be stiff to remove.)
This is what the assembly looked like - absolutely no sign of any corrosion, happily.
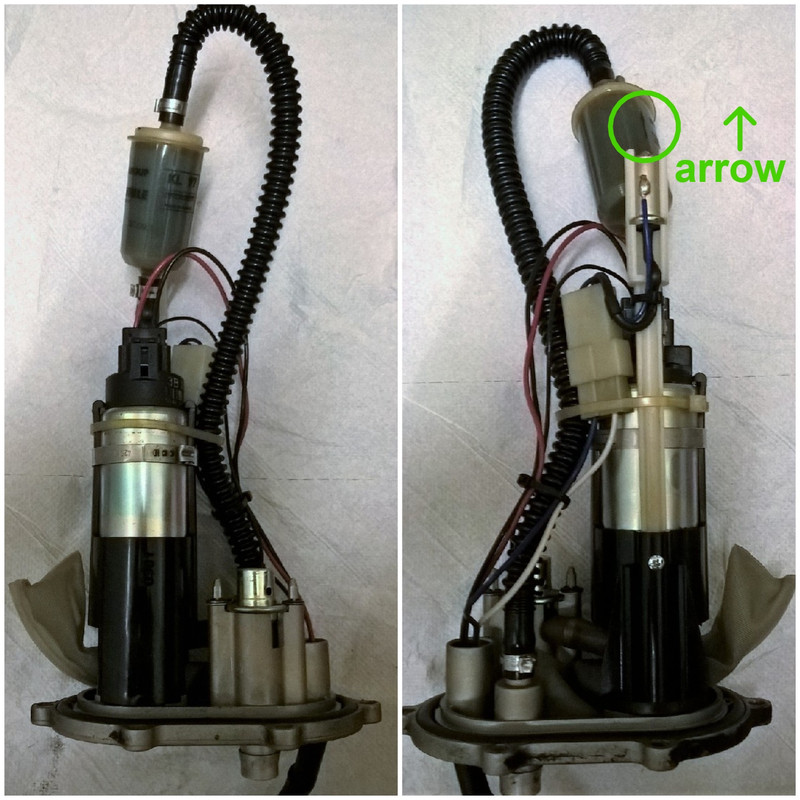 Good as new!
There's nothing special about the Ducati filter (42540151A)
 Mahle KL97 filter
and you can see it's actually a Mahle filter (KL97), which you can get from Opie Oils for about half the Ducati price
https://www.opieoils.co.uk/p-69123-m...97of-kl97.aspx
Changing the filter itself is the quick bit. Just prise open the old clips, remove the old filter, slip new clips over the inlet and outlet hoses and push the new filter fully home onto the hoses.
With the clips themselves, I opted to replace like with like and got virtually identical Oetiker versions from here:
https://hcl-clamping.co.uk/products/...6-11-3mm-304ss
 OEM left; replacement right
Clamping them up is easy; there is a dedicated crimping tool available but an old fashioned pair of pincers does the job just as well.
 Crimping with pincers
Ducati do list a replacement clip kit (69923451A) but don't bother ordering it; according to Craig at Moto Rapido, the clips in the kit, (which are jubilee type not Oetiker), are the wrong size and come with a short length of hose, (which seems to serve no purpose).
 69923451A