2. Checking valve clearances.
The factory spec's for the valve clearances, taken from Ducati Monster 900 Workshop Manual, are as follows:
2v engines.
Opening Rocker
Inlet, mm/in. 0.10-0.12/0.0039-0.0047
Exhaust, mm/in. 0.12-0.15/0.0047-0.0059
Closing Rocker
Inlet and exhaust, mm/in. 0.03-0.05/0.0012-0.0019
4v engines have different recommended clearances.
Before measuring any of your own clearances ensure that the engine is as cold as possible, ideally left overnight!!
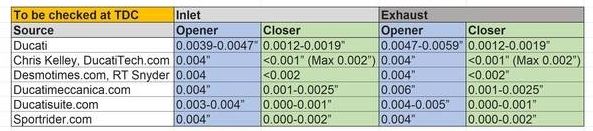
When you read around there are various alternative measurements that are offered up, each for their own reasons to the person who uses them. The following table has been put together to show the various settings from sources ranging from manufacturer, professional engineers, enthusiasts and magazine articles. From here you need to read around and decide whose methods suit you best for your application. There’s no right or wrong answer just different opinions on how to approach the adjustments. But from what I’ve read across them all a sensible approach is to not aim for the smallest reading possible.
Closers: Ideally under 0.001” but not so tight that it binds although anything up to 0.002” is good.
Openers: Ideally aim to adjust for 0.004” or very slightly over.
If in doubt call a Ducati specialist for advice.
Online recommended Settings
Carrying out the valve checks.
1. Before you start put the bike into its highest gear so you can turn the engine over using the rear wheel and put it up on a stand. Tools are available to turn the engine over by hand but they can be pricey from Ducati.
2. If you are working on the vertical cylinder then you need to remove the seat, the tank, the battery and battery tray to make as much space as possible around the cylinder head.
If you are working on the horizontal cylinder head then the bolts securing the oil cooler need to be removed along with the bolt for the oil feed to the carb’s so that the cooler can be lowered out of the way. I also had to remove the mud guard to get the cooler fully out of the way.
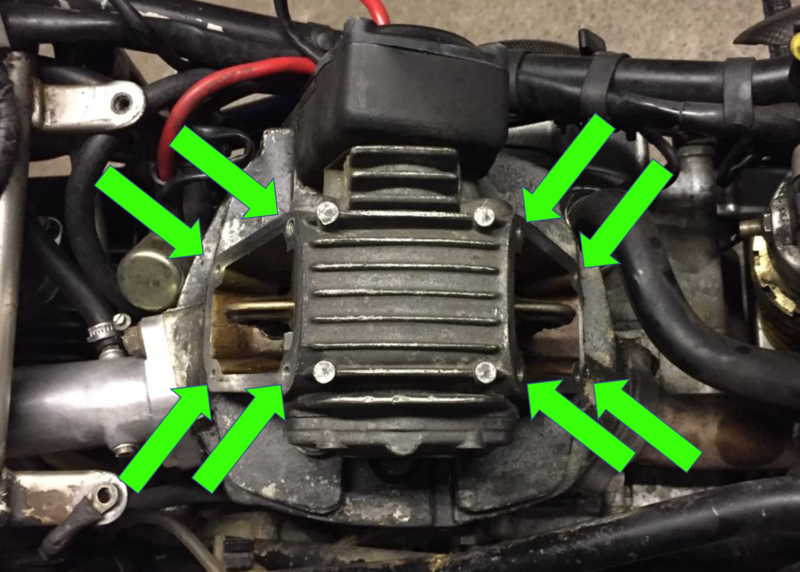
3. Once you have sufficient access to the cylinder head remove the four bolts on each of the inspection covers to expose the valves, rockers and shims. This also allows you to view the rockers and see the valve states as the engine is rotated.
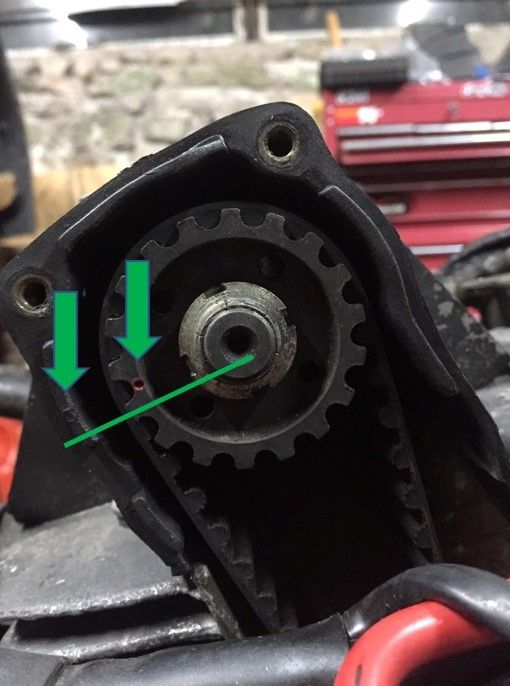
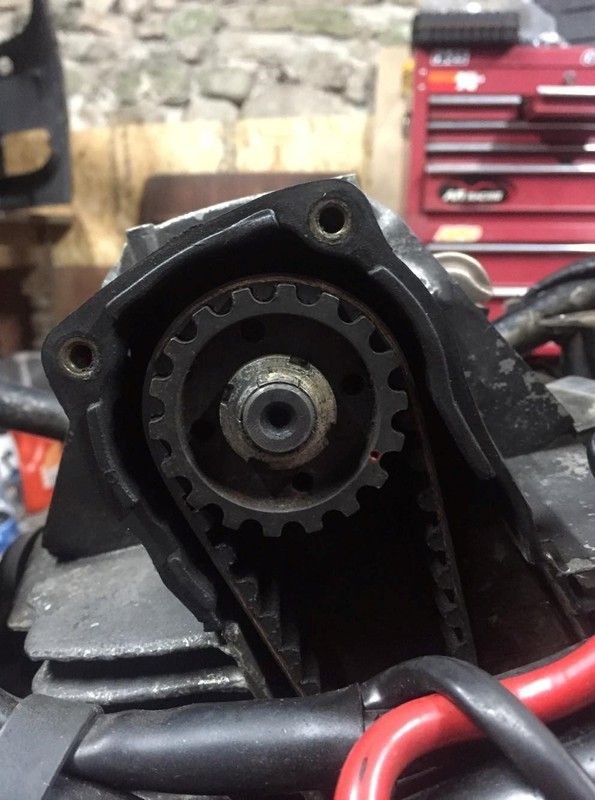
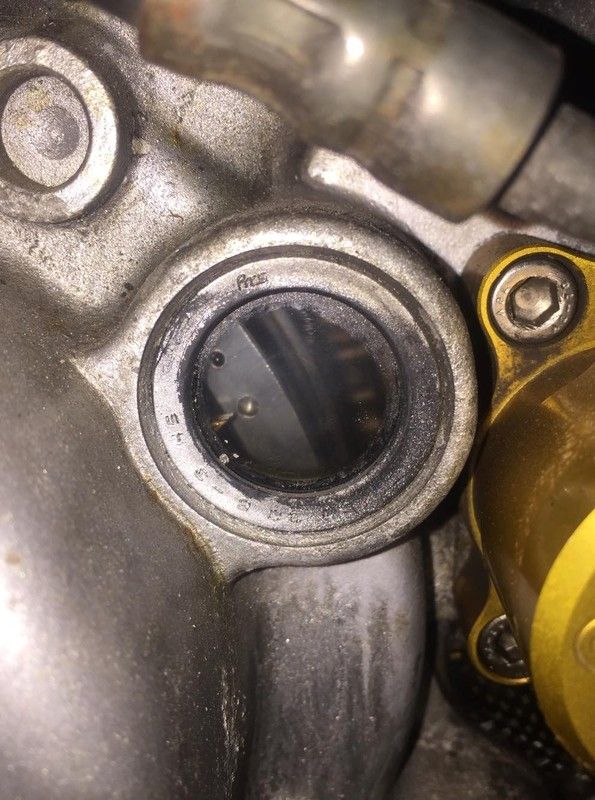
4. Remove the spark plugs and then using the rear wheel, turn the engine over by hand until you line up the arrow marker in the bottom left with these lower of the two marks on the side of the flywheel through the inspection window.
5. Now that you’ve found top dead centre (TDC) the question is which one? The horizontal and vertical cylinders both reach TDC at different times. Every time the flywheel passes through this marker one of the cylinders reaches the top of its cycle. The easy way to tell which has reached the top is by sliding a screw driver into the spark plug hole and checking which one hits a piston. Another way is to remove the top belt cover on the back of the vertical cylinder and check where the pulley marker is. If the indentation on the pulley is lined up with the plastic mark on the casing to the left then the horizontal cylinder is at TDC. If the pulley marker is at the 4 o’clock position then the vertical cylinder has reached TDC.